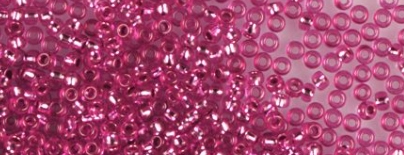
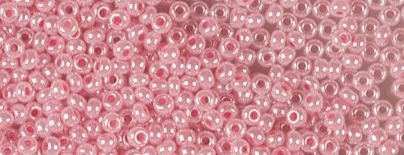
Seed Beads Valentine Gifts made with Love

Difficulty: 4
TECHNIQUE: beadweaving

Box, ring and pendant

Seed beads from the PRECIOSA Traditional Czech Beads™ are perfect for creating romantic gifts.

Ambassadors

Helena Chmelíková

She is able to switch from luxurious and extravagant fashion show pieces to the preparation of hobby projects,

Learn More

Materials & Tools

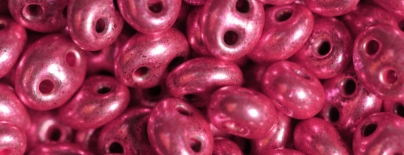
PRECIOSA Twin™

321 96 001; 03291; 2.5 x 5 mm (363x)

(T)
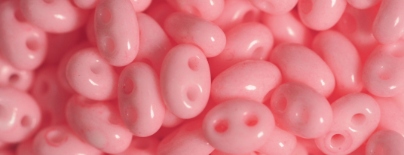
PRECIOSA Twin™

321 97 001; 03191; 2,5 x 5 mm (532x)

(T)
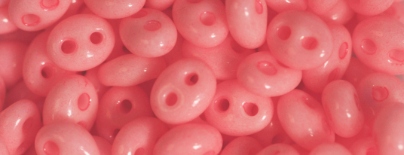
PRECIOSA Twin™

(T)
321 96 001; 18598; 2.5 x 5 mm (118x)
PRECIOSA Rocailles

331 19 001; 08298; 10/0 (104x)

(R)

PRECIOSA Rocailles

331 19 001; 37398; 10/0 (32x)

(R)

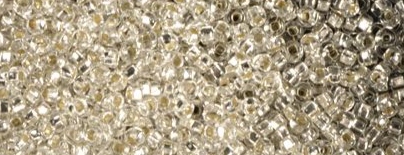
PRECIOSA Rocailles

331 29 001; 78102; 8/0; 9/0; 10/0; 12/0

(R)
Rose Viva2H MC chaton

438 61 613; crystal; 8 mm, 10 mm, 12 mm

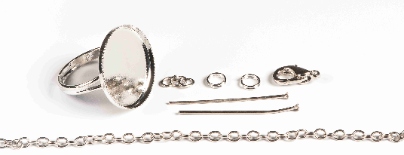
Metal parts:

A ring with a 12 mm and 20 mm facet, a long
eye pin, a fine chain, ovals, a locking ring,
a snap hook
Procedure

Step 1

The ring
Create the initial row using the largest rocailles (26x). Tie off the line. Use a loop in the line to attach a further 26 smaller sized rocailles
above each rocaille (figure no. 1a). When all the rocailles have been sewn on, connect them with the line and continue with the next row
(figure no. 1b).

1 / a

Step 2

Connect the sew-on stone in the second row above. Pass the line through the outer hole from the bottom and leave out one rocaille
in the row and sew through to the next one. Do the same with the second hole.

Step 3

The small ring: 1 row of 20x 9/0 and another of 20x 10/0. Use 10 mm chatons. Stick the resulting piece to the metal part using twopart
glue. The large ring: 26x 8/0, 9/0, 10/0, 12/0 rocailles and a 20 mm chaton are used in the initial row and the other rows. Stick the
resulting piece to the metal part using a fusible adhesive.

3

Step 4

Pendant:
A small ball made of 6x 8 mm chatons sewn around and interconnected. The initial row: 16x R9, the next row: 16x R10. Divide the initial row by 4x R. When creating the second row, always connect three sewn around chatons behind one R from each row and then add 3x R9 (figure no. 4a) to the gaps. Pass the line once more through the initial row and the central rocaille and connect the second and third rocailles from the formerly free rocailles. Tie the end of the line with a knot, pull it among the nearest rocailles and cut it. Repeat this procedure one more time and then connect both parts of the three connected chatons in a similar way. Pass the long eye pin through the created ball and hang it onto the fine chain as a pendant.

4 / a

Step 5

The box
The walls are sewn from mat pink Twin seed beads. String 32x T and alternately tilt them to the left and right in the row. Sew 1x T into
each of the created gaps in the next rows. They will create interconnected columns. A total of 36 columns and 16 rows will be created.

5

Step 6

The base is created out of four triangles of pink matt beads interconnected with metallic pink Twin beads. Sew the triangles according
to the drawing (figure no. 6a) and then sew them into a square. In the first two rows, add one from each side of the T in the same color
as the T. Tie the central 8x T into a ring. Sew the resulting square to the sides of the box by adding a rocaille according to the drawing (figure no. 6b).

6 / a

Step 7

The walls of the box lid consist of 64 columns and 7 rows. The triangles, from which the top of the box lid is created, have 7x outer T.
As such, connect the 7x T from the side wall and leave out the eighth one. Sew the triangles into a square in a similar way as the bottom.
When connecting the triangles from the edge to the connecting T, add the rocailles in three rows.

7

Step 8

In the box with the heart, start with a stringing of 23x T. Alternately tilt the individual T to the sides and then add other T to the gaps. Create 27 columns and 23 rows. String the first metallic T in the middle of the eighth column and add one from each side in the further
rows according to the drawing up to the 18th column until you create a heart (figure no. 8).

8

Step 9

Sew the side walls of the lid with the heart from rectangles created from 15 columns and 7 rows. Count off the 3 outer T on the part with the heart. From the next T, sew the wider side of the prepared rectangle (figure no. 9a, 9b).

9 / a

Downloads

This website is using cookies

To improve our services and provide information that suits your interest, we use the advanced website traffic analytics tools. However, we need your consent. More information about how we process and protect your data can be found in the privacy statement. We ask you for approval of the terms.

Functional cookies These cookies are necessary for the proper functioning of the website and therefore cannot be turned off.
Analytics cookies Analytical cookies help us track and analyze the way visitors interact with our site in Google Analytics 4. This information allows us to improve content and provide a better user experience.
Marketing cookies Reading and writing cookies for marketing purposes for advertising systems such as Google Ads or Sklik. These cookies allow us to track user behavior and measure website performance and the effectiveness of our advertising campaigns.
Personalized advertising Remarketing cookies allow us to present you with personalized advertising based on your previous interactions with our site in systems such as Google Ads, Sklik.
Use of personal data With this option, you consent to the sending and processing of your personal data to Google for the purposes of targeting and evaluating online advertising and targeted marketing.