Colorful Christmas

Difficulty: 2
TECHNIQUE: stringing, simple sewing

Christmas tree with PRECIOSA PermaLux seed beads

Are you looking for Christmas inspiration for a decoration and for your beadwork? We will show you how to make a seed bead Christmas tree that you can use to playfully decorate gifts, your Christmas tree, some branches or even yourself with pretty Christmas earrings or a pendant on a necklace. Use PRECIOSA PermaLux seed beads to achieve a distinctive color design. We wish you many pleasant hours spent Christmas beadworking with Czech seed beads.

Ambassadors

Helena Chmelíková

She is able to switch from luxurious and extravagant fashion show pieces to the preparation of hobby projects,

Learn More

Procedure

Step 1

The necklace

Prepare a guide with 24 eyes. Straighten the guide and snip the metal strip close to the eye.

1

Step 2

Cut off about 170 cm of line. String it through the second hole on the guide. Place the guide approximately in the middle of the line. This means that the line will have a left-hand and a right-hand section. String 3x R8 and 1x R10 onto one section of the line. Thread the line through the last R8. String 2x R8. Thread the line through the next (third) hole on the guide. Thread the line through the next (fourth) hole in the guide. Tighten it.

2 / a

Step 3

Continue stringing the other projections so that there is always 1x R10 at the top. The number of R8 will increase by 1x R8. Always add 1 less R8 after threading the line through the last R8 in each projection. The R8 stringing on the projections – 4x, 5x, 6x, 7x, 8x, 9x, 10x, 11x, 12x and 13x. Sew a total of 11 projections. Replace 1x R8 with 1x RM8 on the shortest three projections, 2x R8 with two RM8 on the next four and 3x R8 with three RM8 on the longest three.

3 / a

Step 4

String the same 11 projections on the other side of the line.

4

Step 5

If the longest projections are soft, you can thread the line through them one more time. The length of the line should enable this. The line will change sides (from the left to the right and vice versa). At the end, tie off the line with three knots. Pull the end into the R8 and cut it off.

5 / a

Step 6

Link the PB onto the eye pin. You will need 8–10 mm of protruding wire. Grasp the edge of the wire with the pliers. Twist it around the points of the needle-nose pliers. Connect it to the outer lower hole of the guide before completely closing the eye.

6 / a

Step 7

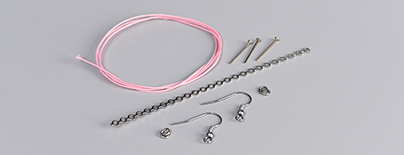
Tie the cord, a ribbon or an earring hook to the top hole on the guide.

You can make Christmas trees in various color shades and different sizes or use them to brighten up your holiday outfit.

7 / a

Downloads

This website is using cookies

To improve our services and provide information that suits your interest, we use the advanced website traffic analytics tools. However, we need your consent. More information about how we process and protect your data can be found in the privacy statement. We ask you for approval of the terms.

Functional cookies These cookies are necessary for the proper functioning of the website and therefore cannot be turned off.
Analytics cookies Analytical cookies help us track and analyze the way visitors interact with our site in Google Analytics 4. This information allows us to improve content and provide a better user experience.
Marketing cookies Reading and writing cookies for marketing purposes for advertising systems such as Google Ads or Sklik. These cookies allow us to track user behavior and measure website performance and the effectiveness of our advertising campaigns.
Personalized advertising Remarketing cookies allow us to present you with personalized advertising based on your previous interactions with our site in systems such as Google Ads, Sklik.
Use of personal data With this option, you consent to the sending and processing of your personal data to Google for the purposes of targeting and evaluating online advertising and targeted marketing.