Circles

Difficulty: 2
Technique: stringing, linking

Earrings made from memory wire

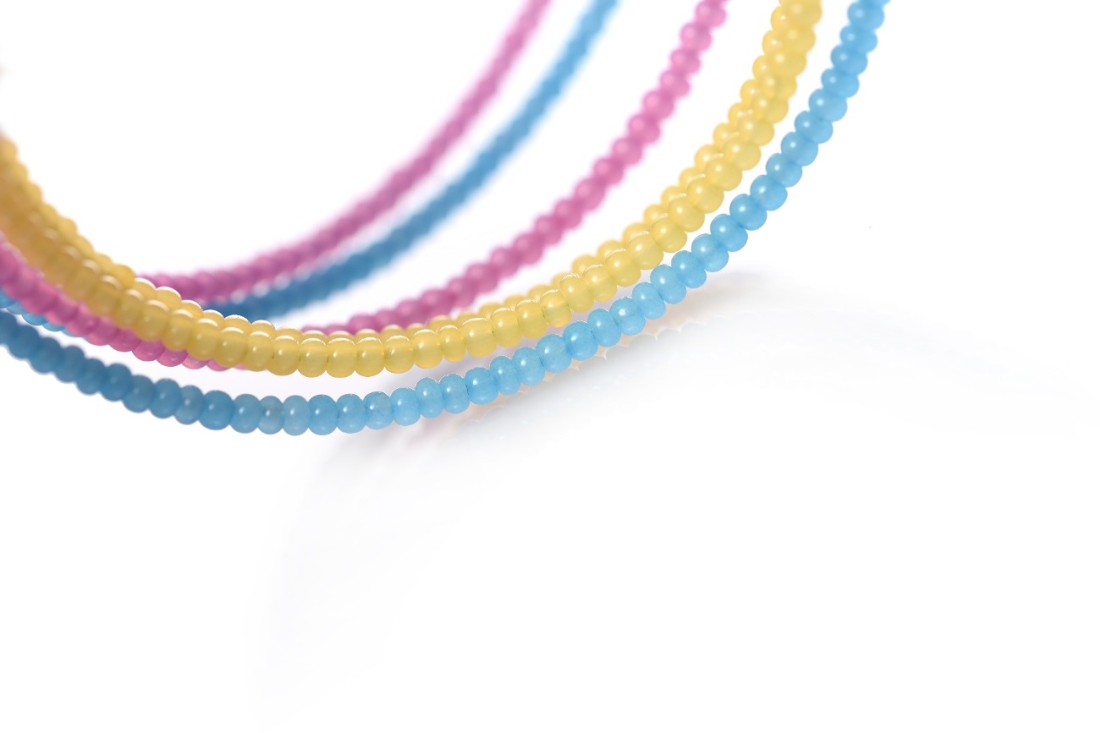
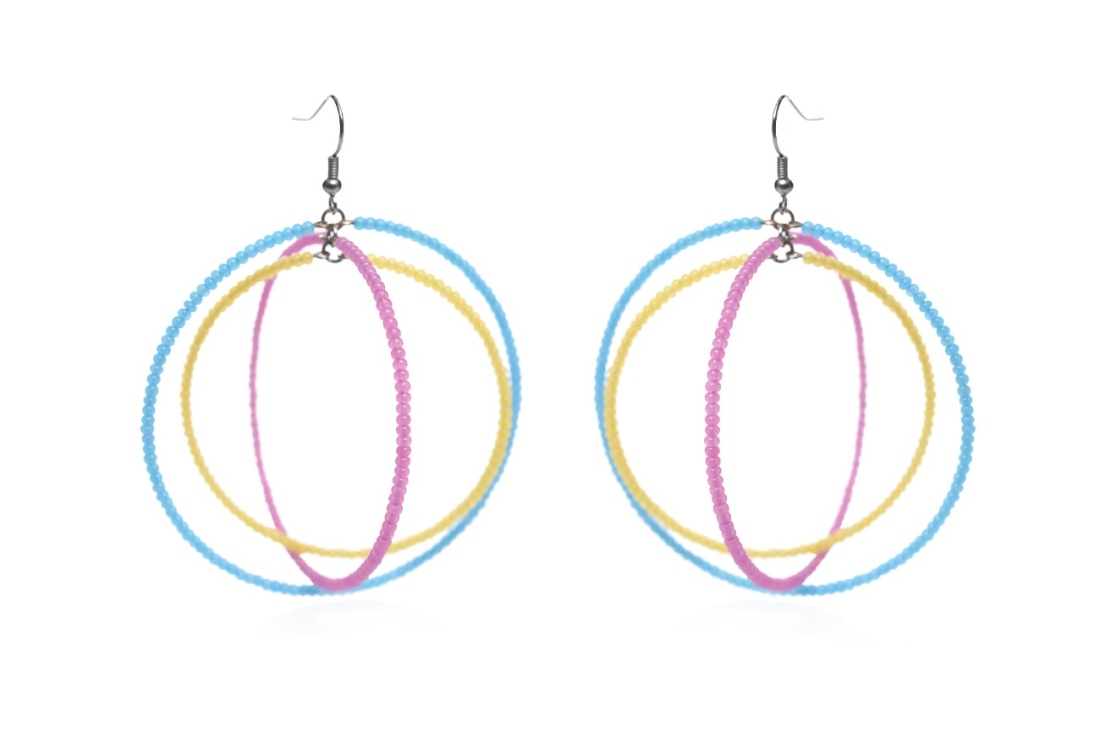
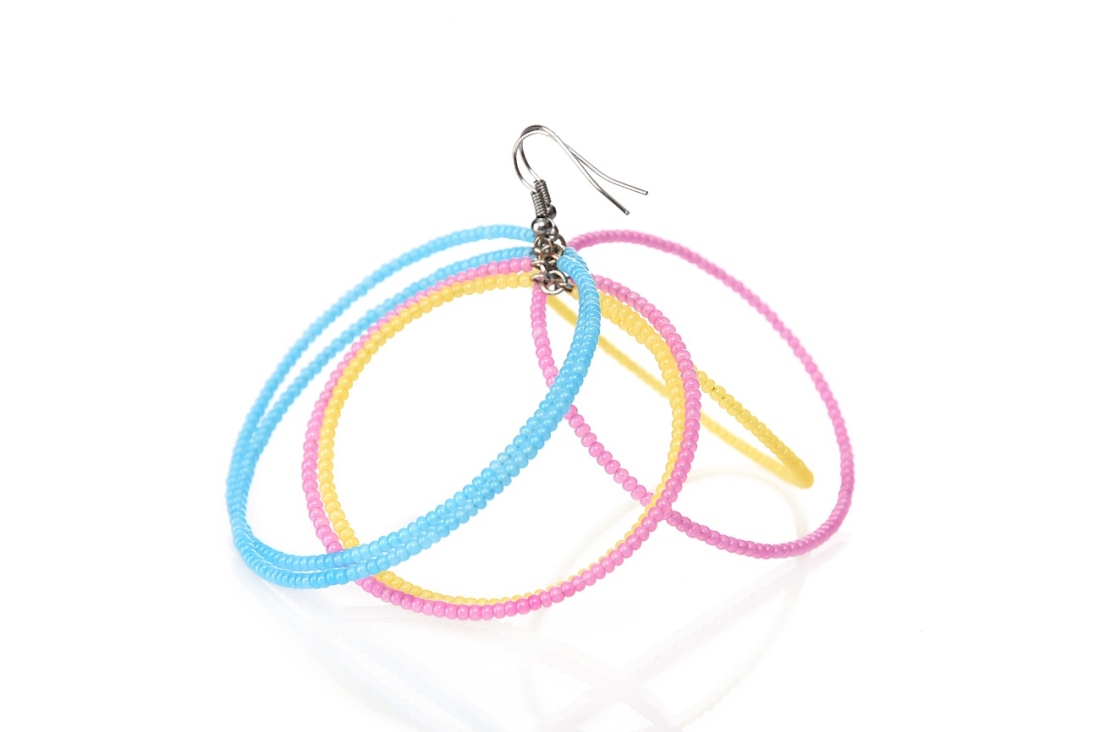
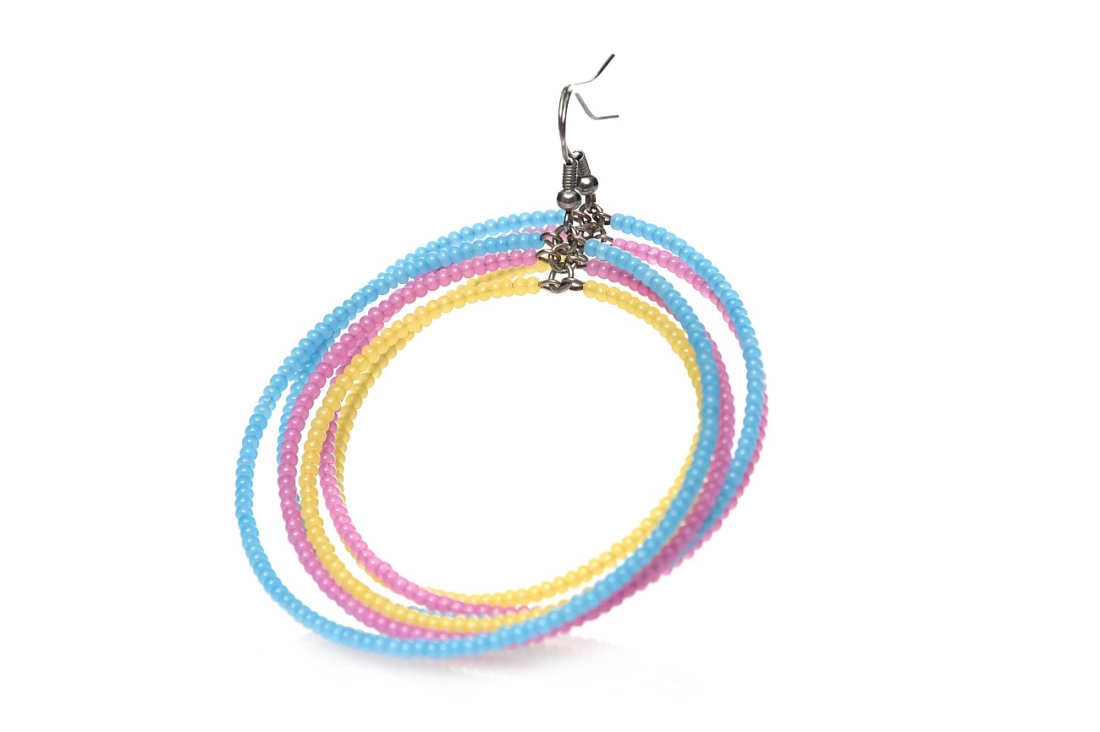
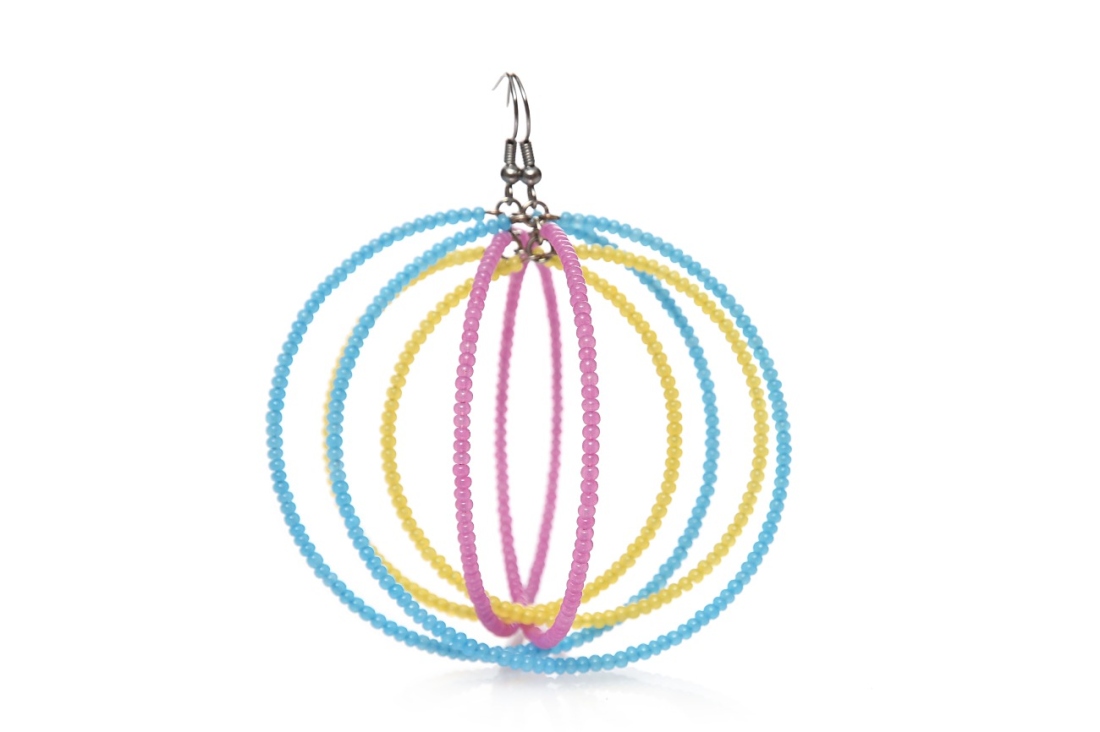
Choose seed beads in the trending colors for Autumn and Winter 2024/2025 and use this tutorial to make a pair of playful earrings. The circles interconnect and create an attractive, moving unit.

Ambassadors

Helena Chmelíková

She is able to switch from luxurious and extravagant fashion show pieces to the preparation of hobby projects,
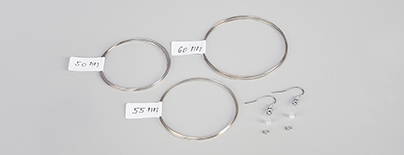
Learn More

Material and Tools

Materials

Memory wire (MW) with a 50 mm, 55 mm and 60 mm diameter; 4 mm rings; earring hooks; rubber stoppers for earring hooks

Tools

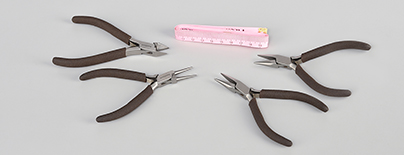
Large snipping pliers for sturdy wire; a pair of flat-nosed pliers; a measuring tape; needle-nosed pliers or pliers with a rounded point

Procedure

Step 1

Snip a 2 to 3 cm piece of MW from each diameter.

1

Step 2

Twist a horizontally placed eye on one end of the MW. Grasp the end of the wire between rounded points at the tip. Turn the pliers and the wire will twist around the point. It will probably be necessary to change your grip on the pliers/move them several times. The MW is tough and resilient. Twist gently backwards at the place where the end of the MW approaches the MW hoop, so that the eye is centrally located. You can squeeze the eye from the side and close it with the flat-nosed pliers. You can also modify it into a horizontal position.

2 / a

Step 3

String the rocailles onto the hoop. String 15.7 cm (up to 100x R1) onto the 50 mm MW, 17.2 cm (up to 110x R2) onto the 55 mm MW and 18.8 cm (up to 120x R3) onto the 60 mm MW. Fill almost the entire hoop. String a rubber stopper onto the memory wire. Use the tape measure to measure the entire length of the R along the outer circumference of the stringing. Remove the stopper and alter the length (add or remove beads) if necessary.

3 / a

Step 4

Remove the stopper. Hold the last R with one hand. Use you second hand to shorten the protruding MW to 8 – 10 mm (8 mm – an almost pointed, rounded point and 10 mm – a round point with a flat surface) with the snipping pliers. Grip the edge of the protruding MW and twist an eye. You can also adjust it using the flat-nosed pliers. Both eyes should be in the same opposite position. You can also adjust the entire hoop with delicate movements.

4 / a

Step 5

Connect the eyes on the R1 hoop using a ring and two flat-nosed pliers.

5 / a

Step 6

Open a new ring. Thread it through the eye on the R2 hoop, the ring on the R1 hoop and the second eye on the R2 hoop.

6 / a

Step 7

Open a new ring. Thread it though the eye on the R3 hoop, the ring on the R2 hoop and the second eye on the R3 hoop.

7 / a

Step 8

Attach an earring hook to the ring on the R3 hoop.

8

Step 9

Create a second earring.

9

Downloads

This website is using cookies

To improve our services and provide information that suits your interest, we use the advanced website traffic analytics tools. However, we need your consent. More information about how we process and protect your data can be found in the privacy statement. We ask you for approval of the terms.

Functional cookies These cookies are necessary for the proper functioning of the website and therefore cannot be turned off.
Analytics cookies Analytical cookies help us track and analyze the way visitors interact with our site in Google Analytics 4. This information allows us to improve content and provide a better user experience.
Marketing cookies Reading and writing cookies for marketing purposes for advertising systems such as Google Ads or Sklik. These cookies allow us to track user behavior and measure website performance and the effectiveness of our advertising campaigns.
Personalized advertising Remarketing cookies allow us to present you with personalized advertising based on your previous interactions with our site in systems such as Google Ads, Sklik.
Use of personal data With this option, you consent to the sending and processing of your personal data to Google for the purposes of targeting and evaluating online advertising and targeted marketing.