Male accessory

Difficulty: 3
Technique: brick stitch

Man's bracelet made of leather and seed beads

Discover the magic of handwork and create an original sewn men's bracelet that is sure to also appeal to the ladies. It will underscore your personality and likewise become a symbol of your unique style. The fresh colors from the seed beads in the PRECIOSA Terra Intensive Lining collection will enable you to create awide range of color combinations.

Ambassadors

Helena Chmelíková

She is able to switch from luxurious and extravagant fashion show pieces to the preparation of hobby projects,

Learn More

Material and Tools

Materials

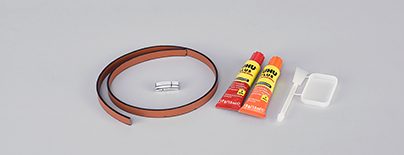
A bag handle – a semi-product (width: 1 cm; thickness: 0.2 cm); a magnetic fastener – a rectangle (2.5 cm x 1.2 cm; the opening for gluing – 1 cm x 0.4 cm); glue for absorbent/non-absorbent material
Tools

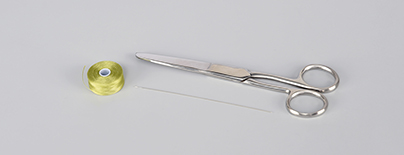
A nylon line (S-lon; in a shade that is similar to the used material); scissors; a thin needle
Procedure

Step 1

Cut off about 1.5 m of line. Thread the line into the eye of the needle. The line slides very easily. Tie it to the eye of the needle using a simple knot. Occasionally retighten the knot.

1

Step 2

String 14x R. Use the ladder chain stitch to thread the line through every strung R again. Thread the line through the 1st R. Tie off the line with three knots. This will create a circle of R.

2 / a

Step 3

Thread the line through the R next to the knot. Now start sewing using the brick stitch. Attach the new R to the visible line between the R from the previous row. String 1x R, pass the needle under the line and thread it through the R again.

3

Step 4

The beginning of every row. String 2x R. Pass the needle under the line in the second gap. Thread the line through the 2nd strung R again.

4

Step 5

Continue stringing 1x R until the end of the row. Thread the needle under the line and then thread it through the R again.

5

Step 6

The end of the row. Thread the line through the 1st R from Step 4. Thread the needle under the line in the 1st gap at the start of the row. Thread the line through the R one more time. Tighten it. The R may resist slightly.

6

Step 7

Sew a total of 34 rows (including the ring from the 2nd row) according to the pattern of the R colours. You will need another 1.5 m of line. Sew the first line into the already sewn section. Thread the new line through several R in the sewn section. Create a loop of line around the line between the R. Thread it through twice. Tighten and thread the line through to the edge of the sewn section. Continue sewing.

7 / a

Step 8

Cut off 19.5 cm of the strap. Thread the line through the tunnel. Glue the end onto the fastening. Once the tunnel has dried, move it to the centre of the strap.

8 / a

Downloads

This website is using cookies

To improve our services and provide information that suits your interest, we use the advanced website traffic analytics tools. However, we need your consent. More information about how we process and protect your data can be found in the privacy statement. We ask you for approval of the terms.

Functional cookies These cookies are necessary for the proper functioning of the website and therefore cannot be turned off.
Analytics cookies Analytical cookies help us track and analyze the way visitors interact with our site in Google Analytics 4. This information allows us to improve content and provide a better user experience.
Marketing cookies Reading and writing cookies for marketing purposes for advertising systems such as Google Ads or Sklik. These cookies allow us to track user behavior and measure website performance and the effectiveness of our advertising campaigns.
Personalized advertising Remarketing cookies allow us to present you with personalized advertising based on your previous interactions with our site in systems such as Google Ads, Sklik.
Use of personal data With this option, you consent to the sending and processing of your personal data to Google for the purposes of targeting and evaluating online advertising and targeted marketing.