Elegance with Twin

Difficulty: 3
Technique: Basic Beadweaving, Stringing, Wire Wrapped Loop

Costume jewellery set with PRECIOSA Twin™

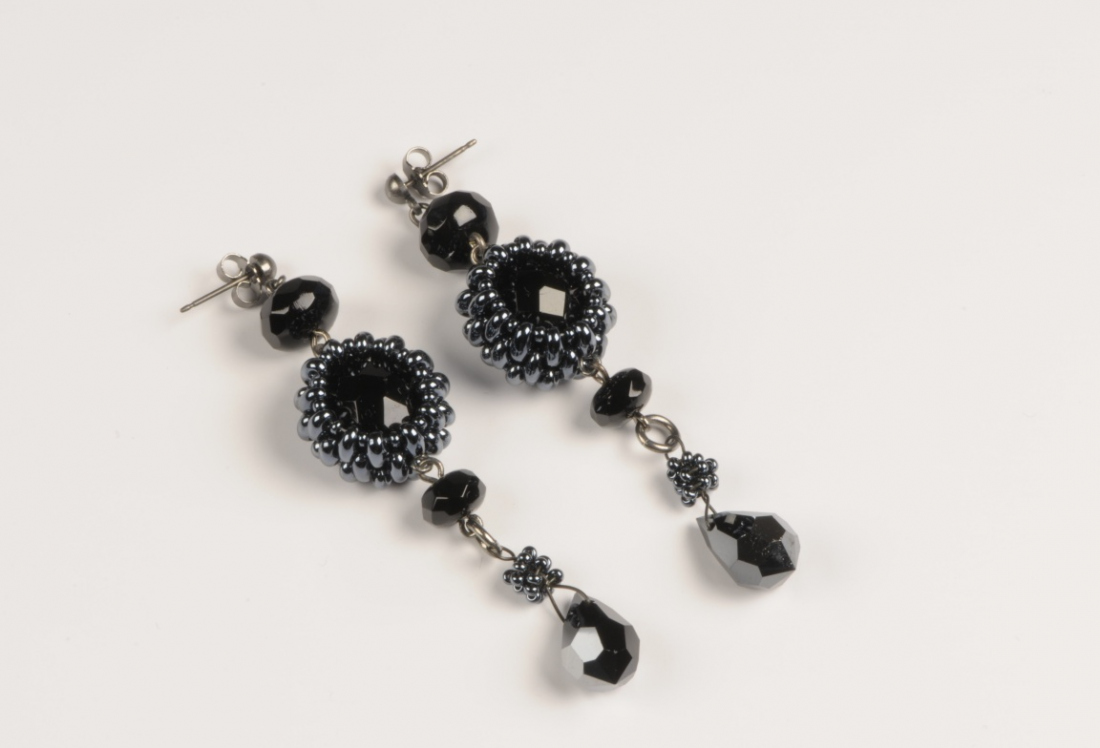
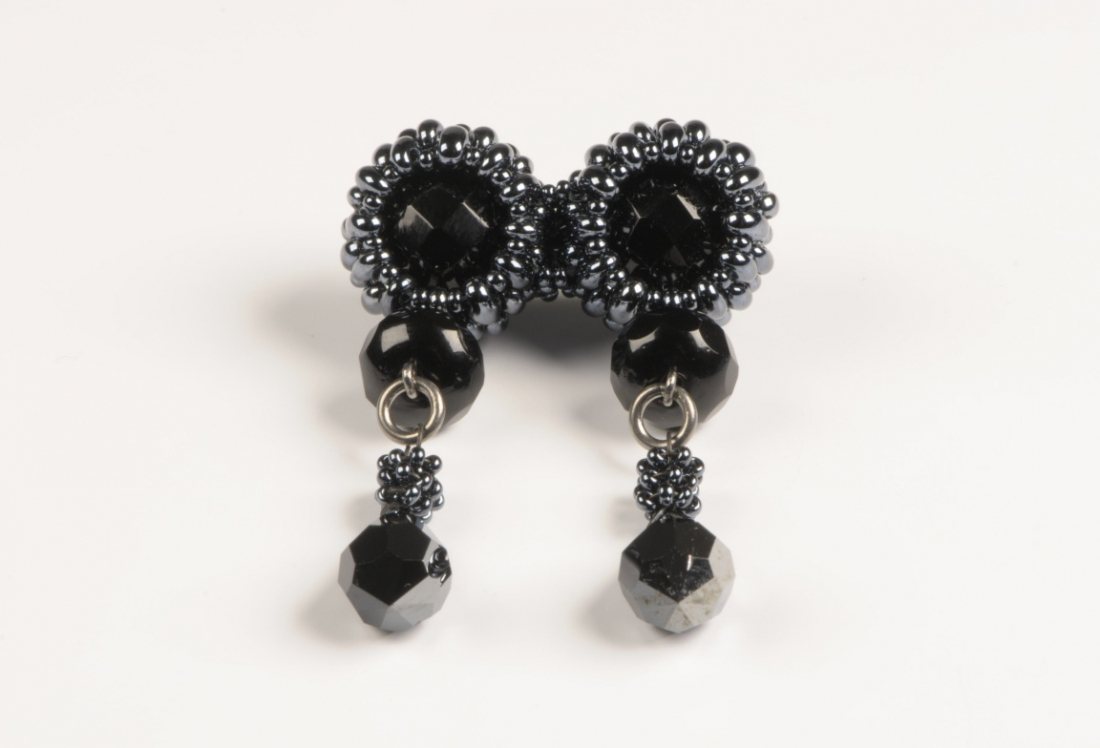
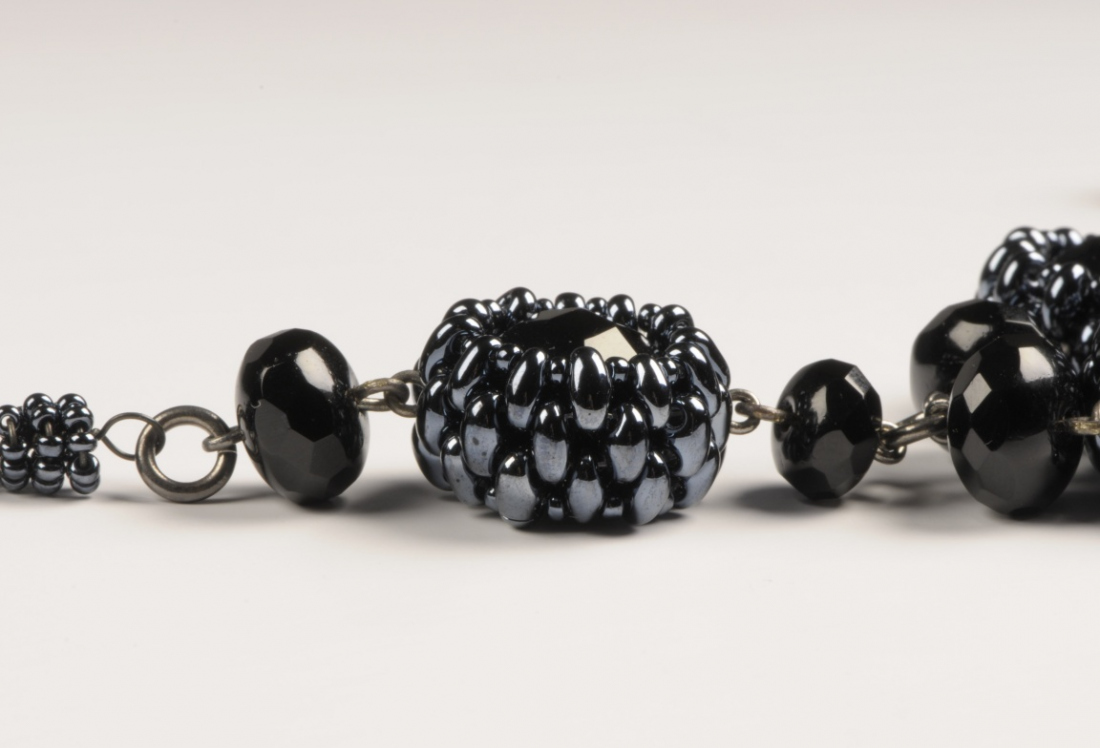
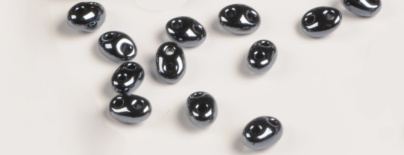
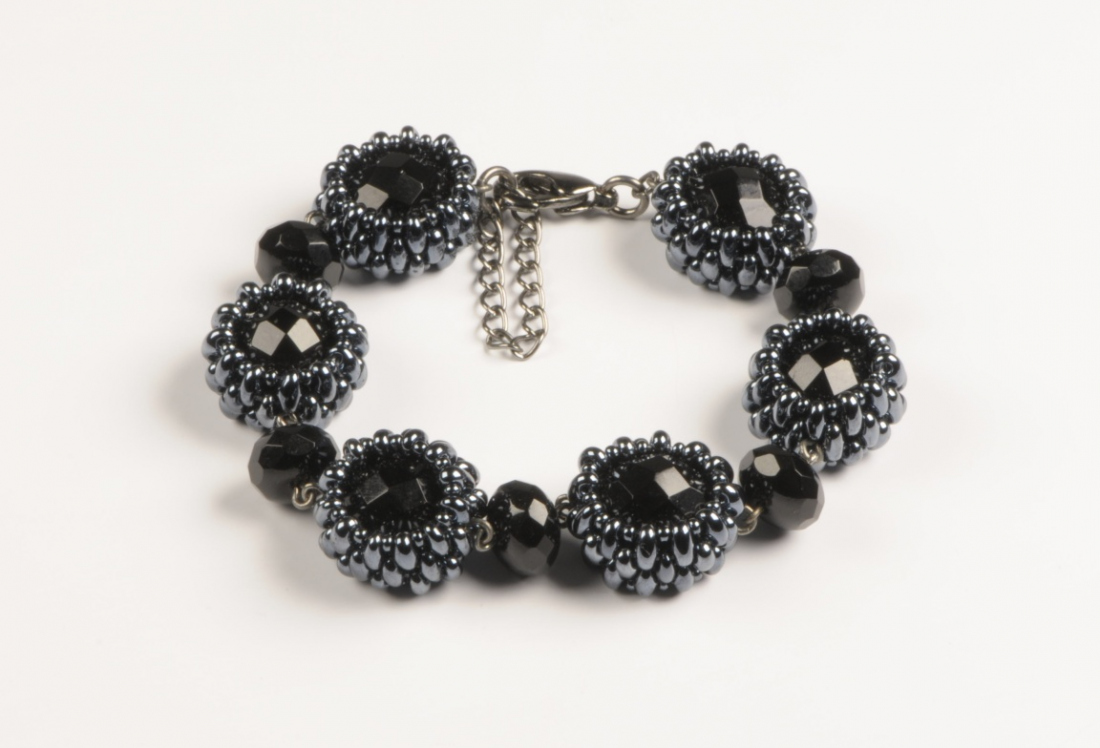
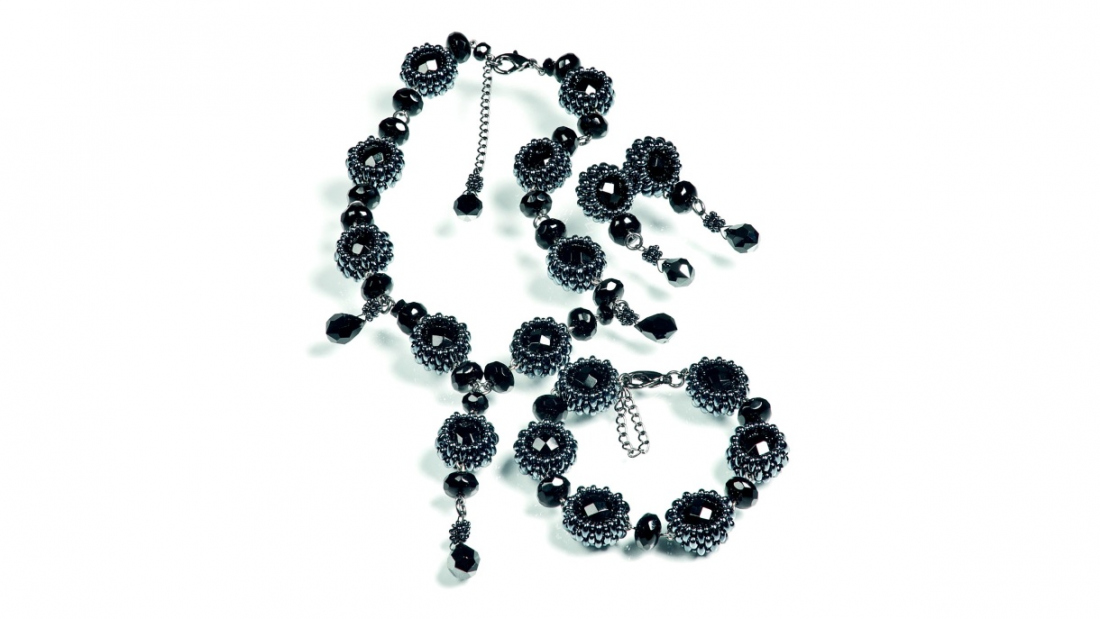
Preciosa Ornela presents another option for the creative use of the unique oval two-hole PRECIOSA Twin™ Seed Bead. Using this seed bead it is possible to sew in the round beads in a simple way and to create a very interesting fragment, the repetition of which enables the completion of an elegant costume jewelry set which consists of a necklace, a bracelet, a brooch and a ring. Try this easy and effective method of using the PRECIOSA Twin™ Seed Beads :o)! 

Ambassadors

Helena Chmelíková

She is able to switch from luxurious and extravagant fashion show pieces to the preparation of hobby projects,
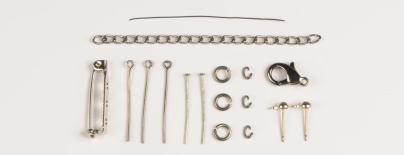
Learn More

Materials & Tools

Other materials & tools

26 mm, 20 mm, 18 mm and 16 mm eye pins, 24 mm, 20 mm, 18 mm and 16 mm pins, rings 6 mm, ovals, an adjusting chain, a snap hook, earring hooks, a broach pin 0.35 mm, binding wire

Tools

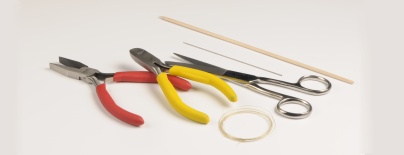
Scissors, a thin stringing needle, a 0.20 mm nylon line, flat nose, needle nose and snipping pliers, skewers, hot melt adhesive

Procedure

Step 1

The pendants

String the binding wire into  the hole of the MCBD. Press both parts of the  wire together and twist 3x. Twist the longer part of the wire around a skewer and create an eye. Twist the remainder of the wire around the created neck from the top to the bottom. Then string 20x Rand once again twist the wire with the rocailles around the created neck, tighten well, pass the end of the wire under the created spirals and pinch the end of the wire. In this way, prepare 7 tear-shaped pendants: 3 for the necklace, 2 for the pair of earrings and 2 for the brooch.

1 / a

Step 2

The sewn-in bead

String 24 T onto the line and tie them into a ring. Pass the line through the second hole of the last T. Tilt the individual T out to the opposite sides and add one T to each of the created gaps and string 12x T in this row. This will give rise to three rows of strung T. At the end of the row, once again pass the line through the second hole in the last T. Then string one R into the gaps between the outer T: a total of 12 beads (figure no. 1, 2 and 3). Finish the row with a strong knot and pass the end of the line through to the opposite edge and once again fill the gaps between the T with 12x R. Before tightening this outer row, place 1x 12 mm FPBR into the created opening, tighten the outer line and finish it with a knot. Then pass the end of the line through to the inside row between the T. Pass the eye pin through the hole of the FPBR between the T of the central row and finish with an eye. In this way, prepare 9x beads for the necklace, 5x for the bracelet, 2x for the earrings, 2x for the broach and 1x for the ring. A total of 19 is therefore necessary for the entire set.

2 / a

Step 3

The necklace

Connect 1x 9 mmFPBG on both sides of the sewn-in bead and connect the individual created fragments using the rings. Add 1x 5 mm FPBG on each side (a total of 4) at the edges and in the central section of the necklace. Also attach the prepared pendants (figure no. 4) to the rings in the central part of the necklace. Connect one fragment with the sewn-in bead to the central part of the necklace and finish it with a pendant. In order to soften this central section, use the smaller sized 7 mm FPBG (figure no. 5). Connect the snap hook and the adjusting chain ended with a pendant.

3 / a

Step 4

The bracelet

As with the necklace, connect the individual fragments of 5 sewn-in beads and end with a snap hook and adjusting chain: do not add the pendants here.

4

Step 5

The brooch

Sew the sewn-in beads together at the edge of the opening using 12x R on each side and hang the pendants at its centre. Adhere the broach pin on the back using the hot melt adhesive.

5 / a

Step 6

Earrings

Connect one size of FPBG (7 or 9 mm) to each size of the sewn-in bead. Connect the pendant to the larger bead using a ring and connect the earring mechanism on the other side using an oval.

6

Step 7

The ring

Do not cut one end of the line at one of the beads sewn-in with Twin and continue stringing 1x R, 1x T, 1x R, 1x T until you have strung a total of 17x R and 16x T. Pass the line through the outer hole of one T in the opposite part of the Twin decoration and continue back by adding 1x R between the individual T. As such, string a total of another 17x R. Pass the line through the outer hole of the Tone more time, pass it through the circle again and finish with a firm knot which you should then hide between the and in doing so end the circle forming the ring.

7 / a

Downloads