Christmas bell

Difficulty: 1
Technique: linking

Christmas decoration made using Preciosa Traditional Czech beads™

Preciosa Ornela presents a simple tutorial on how to make a Christmas decoration, a bell, which you can make from seed beads from the PRECIOSA Traditional Czech Beads™ brand. The size of the bell depends on the size of the selected bugles and rocailles. If you use this procedure and the recommended size, you will end up with a ca 5 cm bell which can be used as a popular Christmas decoration or a pleasant gift. We wish you happy Christmas beadworking.

Ambassadors

YANI - Drahomira Krupkova

Drahomíra Krupková’s company has been involved in the design and manual production of glass costume jewellery for almost 30 years.

Learn More

Procedure

Step 1

Measure out 1 m of the recommended soft wire. Proceed according to the figure 1. Alternately string 1x R, 1x B, 1x R, 1x B, 1x R, 1x B, 1x R, 1x B, 1x R, 1x B, 1x R, 1x B, a total of 6x R and 6x B. Leave about 7 cm free at the end of the wire. Thread the wire through the third strung R. String 1x B, 1x R and 1x B. Thread the wire through the first strung R. String 1x B, 1x R, 1x B, 1x R and 1x and thread the wire through the seventh rocaille.

1

Step 2

Continue alternately adding 1x B, 1x R and 1x B or add 1x B, 1x R, 1x B, 1x R and 1x B to the edges of the individual rows and create
a mesh.

2

Step 3

Connect the seed bead mesh together. Thread the wire through the outer R and add 1x B.

3

Step 4

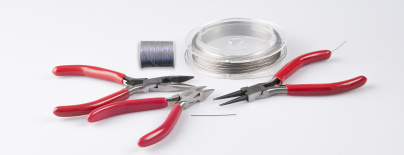
Thread the wire through the top outer R and tighten it into a tight circle, cross both ends of the wire over one another, grasp them between your fingers or with the flat nose pliers and join them together; twist them together ca 4x and snip off any excess wire. Hide the ends of the twisted wire inside the bell (figure 4a). String an 8 mm round bead, 10x R and a 6 mm round bead onto the eye pin (figure 4b), pass the pin through the centre of the bell (figure 4c), add an 8 mm round bead and shorten the pin as necessary using the snipping pliers (figure 4d). Create a loop with the needle nose pliers, thread the silver cord through it and tie the ends together with a knot (figure 4e).

4 / a

Downloads

This website is using cookies

To improve our services and provide information that suits your interest, we use the advanced website traffic analytics tools. However, we need your consent. More information about how we process and protect your data can be found in the privacy statement. We ask you for approval of the terms.

Functional cookies These cookies are necessary for the proper functioning of the website and therefore cannot be turned off.
Analytics cookies Analytical cookies help us track and analyze the way visitors interact with our site in Google Analytics 4. This information allows us to improve content and provide a better user experience.
Marketing cookies Reading and writing cookies for marketing purposes for advertising systems such as Google Ads or Sklik. These cookies allow us to track user behavior and measure website performance and the effectiveness of our advertising campaigns.
Personalized advertising Remarketing cookies allow us to present you with personalized advertising based on your previous interactions with our site in systems such as Google Ads, Sklik.
Use of personal data With this option, you consent to the sending and processing of your personal data to Google for the purposes of targeting and evaluating online advertising and targeted marketing.