Christmas twig

Difficulty: 3
Technique: Wirework
Designer: archiv PCO

Christmas decoration made from PRECIOSA Traditional Czech Beads™

Classical Christmas decorations made from Czech beads and seed beads have been part of the Christmas atmosphere of many households and interiors for several decades. Preciosa Ornela presents a sparkling Christmas twig made using Czech bugles from the PRECIOSA Traditional Czech Beads™ brand. Due to the great response to the publication of photographs of seed bead Christmas decorations from the Preciosa Ornela archive, we are offering you the option of trying out the production of this impressive decoration or Christmas jewel. The following is a detailed set of instructions which will take you through the production of the Christmas seed bead twig step by step. We wish you merry Christmas fun with our seed beads :o). 

Materials & Tools

Tools

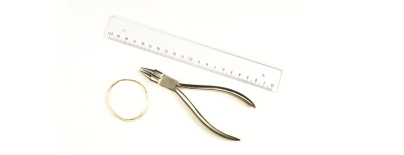
0.37 mm wire (ca 5 m according to the size and density of the twig), snipping pliers, a rule
Procedure

The Christmas seed bead decoration consists of several individual twigs which you can join together as needed or they can be attached using a broach pin or a safety pin. Select the size of the used bugles according to the availability of the material or the size of the resulting twig.

Step 1

Prepare a ca 80 cm long piece of wire and bend it precisely in half. String one bugle on each end of the wire and move them up to the central bend on the wire (figure no. 1a). Grip both bugles between the thumb and the index finger of your left hand and twist both crossed ends of the wire with your right hand 5x so that both the bugles are sufficiently tight. This fastens the bugles together (figure no. 1a). This basic principle will be used to create the entire twig. 

1 / a

Step 2

Continue alternately at each end of the wire. Always string two bugles, move them to the edge of the twisted wire and at a distance which correspond to about twice the size of the selected bugles, double the wire over between both bugles and press both bugles together with the thumb and index finger on your left hand. Once again, twist the crossed wire 5x in order to fasten the next two bugles together (figure nos. 2a and 2b). Continue in this way on the individual wires until you achieve the required length of the twig. 


2 / a

Step 3

At the end of each branch or a selected branch, string three imitation pearls on the end of the wire and fasten them together by twisting the wire. All of the created twigs can then be connected together by twisting the remaining ends of the wire together. 

3

Step 4

Shorten the ends of the twigs with snipping pliers and bend them back between the twigs. If using a broach pin, hide the wire under this metal part. 

4 / a

Downloads

This website is using cookies

To improve our services and provide information that suits your interest, we use the advanced website traffic analytics tools. However, we need your consent. More information about how we process and protect your data can be found in the privacy statement. We ask you for approval of the terms.

Functional cookies These cookies are necessary for the proper functioning of the website and therefore cannot be turned off.
Analytics cookies Analytical cookies help us track and analyze the way visitors interact with our site in Google Analytics 4. This information allows us to improve content and provide a better user experience.
Marketing cookies Reading and writing cookies for marketing purposes for advertising systems such as Google Ads or Sklik. These cookies allow us to track user behavior and measure website performance and the effectiveness of our advertising campaigns.
Personalized advertising Remarketing cookies allow us to present you with personalized advertising based on your previous interactions with our site in systems such as Google Ads, Sklik.
Use of personal data With this option, you consent to the sending and processing of your personal data to Google for the purposes of targeting and evaluating online advertising and targeted marketing.