Rosarium

Difficulty: 3
Technique: basic beadweaving

Sewn bracelet made with PRECIOSA Candy Rose

We have prepared an attractive bracelet for you in pastel shades and made with the new PRECIOSA Candy Rose bead in combination with PRECIOSA Solo™. We have modified the smooth shape of PRECIOSA Candy™ and created an embossed surface with a stylised rose, as the name suggests.

Ambassadors

Helena Chmelíková

She is able to switch from luxurious and extravagant fashion show pieces to the preparation of hobby projects,

Learn More

Procedure

The bracelet consists of three rows of CR. Simultaneously string the first and second rows on a long stringing. Then thread the third row to the second row. Reinforce the edges with a stringing of S.

Step 1

The CR rows

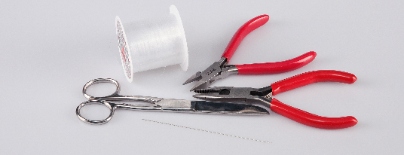
Prepare about 80 cm of line. Secure the line about 15 cm from the beginning by threading it through an R8 twice. String 1x R10. All of the CR should be turned with their face (rose pattern) upwards. String the first CR in the lower hole and the second CR in the upper hole. Add 1x R10. String the third CR in the upper hole and the fourth in the lower hole. Repeat this stringing procedure another 7x from the 1st R10, so that you have done it a total of 8x. At the end, string 1x R10 and 1x R8. Thread the line through the R8 two more times. Allow the free end of the line to hang.

1 / a

Step 2

Once again prepare 80 cm of line. Secure the end with an R8. String 1x R10. Thread the line through the lower hole of the new CR, through the upper hole of the first strung CR and through 1x R10. Thread the line through the top hole of the second strung CR and through the lower hole of the next new CR. Also repeat this stringing 7x from the 1st R10, so that you have done it a total of 8x. At the end, string 1x R10 and 1x R8. Thread the line through everything again from the last strung R10. Return the line almost all the way to the beginning. Thread the short end of the line through the beginning. Tie off the ends between the CR and pull them into the beads. Cut them off.

2 / a

Step 3

Thread a line through the CR and R from Step 1.

3

Step 4

Reinforcing the edges

Secure the line with an R8 on the edge which has more S. String 1x R10. Thread the line through the upper holes of all the CR. Add 1x R10 between the CR. String 2x S, 1x R10 and 2x S in an arch above the CR. String 1x R10 and 1x R8 at the end. Thread the line through everything one more time.

4 / a

Step 5

Thread the line through the upper holes of the CR on the edge which has less S. Add R10 between them and 2x S, 1x R10 and 2x S in the arches. Thread the ends of the line under the outer R10 from Step 1. Thread the line through everything again.

5 / a

Step 6

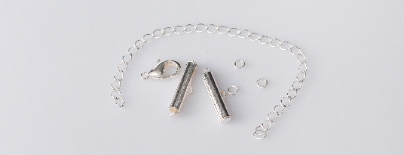
String the outer R8 to the hanger. Close the hanger cap.

6 / a

Step 7

Cut off about 8 cm of adjusting chain. Thread a ring through the end link and connect it to the eye on the hanger. Attach the carabiner with two rings at the opposite end of the bracelet.

7 / a

Downloads

This website is using cookies

To improve our services and provide information that suits your interest, we use the advanced website traffic analytics tools. However, we need your consent. More information about how we process and protect your data can be found in the privacy statement. We ask you for approval of the terms.

Functional cookies These cookies are necessary for the proper functioning of the website and therefore cannot be turned off.
Analytics cookies Analytical cookies help us track and analyze the way visitors interact with our site in Google Analytics 4. This information allows us to improve content and provide a better user experience.
Marketing cookies Reading and writing cookies for marketing purposes for advertising systems such as Google Ads or Sklik. These cookies allow us to track user behavior and measure website performance and the effectiveness of our advertising campaigns.
Personalized advertising Remarketing cookies allow us to present you with personalized advertising based on your previous interactions with our site in systems such as Google Ads, Sklik.
Use of personal data With this option, you consent to the sending and processing of your personal data to Google for the purposes of targeting and evaluating online advertising and targeted marketing.