Unkempt

Difficulty: 1
Technique: Basic Beadweaving, stringing

Bracelet made using PRECIOSA Chilli™

Preciosa Ornela presents the PRECIOSA Chilli™ Pressed Bead from the PRECIOSA Traditional Czech Beads™ brand.
The elongated imaginative shape supplements the popular range of two-hole beads with which it has an identical hole spacing.
The axially deviated holes predestine this bead for simple compositions in the form of a zip in the case of a regular stringing on a strong or flexible material, during which the ridge of the bead excellently interlocks into the side groove of the adjacent one. The flattened shape and the side orientation of the holes enable the creation of flat relief applications in combination with round beads and seed beads up to a size of 4 mm. It is also suitable for use with the PRECIOSA Pip™, PRECIOSA Solo™ or PRECIOSA Thorn™ beads. This new bead is suitable for all types of surface finishes.

Ambassadors

Helena Chmelíková

She is able to switch from luxurious and extravagant fashion show pieces to the preparation of hobby projects,

Learn More

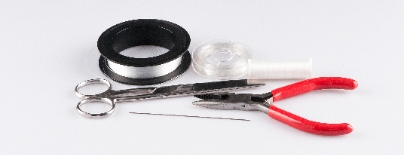
Materials &Tools

Procedure

The Chilli beads are two-rowed. They have one hole at the edge of the bead and a second in the middle. You need 120 small parts consisting of two Chilli beads with a 6/0 rocaille between them to make this bracelet. It is necessary to make 30 pieces from each rocaille color. Tie six of them into a ring. There will be 20 rings. You can mix the colors as you wish. String the rings onto the Opelon.

Step 1

Thread the line through the outer hole of the bead in the direction from the inside (the groove) out. Thread the line through the central hole from the outside inwards. String a 6/0 rocaille. Take the second bead. Thread the line outwards through the central hole. Thread the line through the outer hole inwards. Tighten. Tie off the line using three knots. Cut off the ends of the lines as close to the beads as possible.

1 / a

Step 2

Use the opening created between the rocaille and both beads. Thread the line through it in six parts of any arbitrary color. Thead the line through the holes once again. Tie off the line with three holes. Cut off the end of the lines as near as possible to the beads.

2 / a

Step 3

String about 15 cm of thin tailor‘s thread onto the thin needle. Tie off the ends. This will lead to the creation of a large loop. You can also use thicker tailor‘s thread with a large loop.

Step 4

hem into the loop. Fold them in half. String all the rings. Tie off both ends of the Opelon (there are four strands at each end) with three knots. Straighten the bracelet. 

The bracelet will never retain its shape permanently, so you will have to straighten it. You can extend the bracelet, if you make more parts.

4 / a

Downloads

This website is using cookies

To improve our services and provide information that suits your interest, we use the advanced website traffic analytics tools. However, we need your consent. More information about how we process and protect your data can be found in the privacy statement. We ask you for approval of the terms.

Functional cookies These cookies are necessary for the proper functioning of the website and therefore cannot be turned off.
Analytics cookies Analytical cookies help us track and analyze the way visitors interact with our site in Google Analytics 4. This information allows us to improve content and provide a better user experience.
Marketing cookies Reading and writing cookies for marketing purposes for advertising systems such as Google Ads or Sklik. These cookies allow us to track user behavior and measure website performance and the effectiveness of our advertising campaigns.
Personalized advertising Remarketing cookies allow us to present you with personalized advertising based on your previous interactions with our site in systems such as Google Ads, Sklik.
Use of personal data With this option, you consent to the sending and processing of your personal data to Google for the purposes of targeting and evaluating online advertising and targeted marketing.