Difficulty: 3
Technique: Peyote Stitch
Brooch made of honey colored atlas

Honey - Colored Poinsettia

The leaves of a poinsettia, sewn using the peyote stitch with atlas three-cut beads and rocailles from the PRECIOSA Traditional Czech Beads brand, make excellent use of the refined effect created by unique atlas glass. This tutorial will enable you to create an elegant broach in atlas colours. Thanks to the range of colours and surface finishes on PRECIOSA seed beads, you can create various tone-in-tone colour combinations and thus refresh your wardrobe with a range of unique accessories.

PRECIOSA ORNELA wishes you many creative ideas and much inspiration when working with our beads and seed beads.
 

Ambassadors

Helena Chmelíková

She is able to switch from luxurious and extravagant fashion show pieces to the preparation of hobby projects,

Learn More

Material & Tools

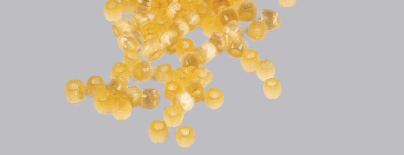
PRECIOSA three-cut beads

361 31 001; 9/0; 15041 (546x)
(Th-C)

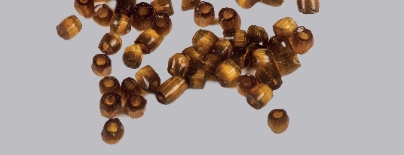
PRECIOSA three-cut beads

361 31 001; 9/0; 15101 (390s)
(Th-C)

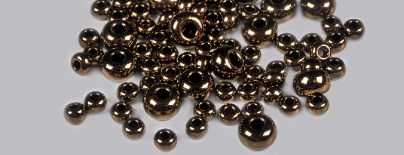
PRECIOSA Rocailles

331 19 001
10/0; 59145 (84xR10
8/0; 59145 (75xR8)
7/0; 59145 (8xR7)

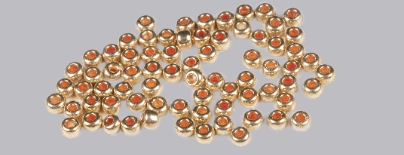
PRECIOSA Rocailles

331 19 001; 10/0; 18581 (105x)
(R10)

PRECIOSA imitation pearls

131 10 011; 6 mm; 78600 (5x)
(IP)

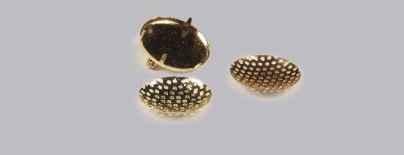
Metal parts

20 mm broach sieve, gold
22 mm circle with a broach clasp, gold
 

Material

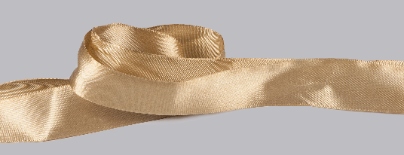
golden ribbon (width: 2.6 cm, 70 cm)  

Tools

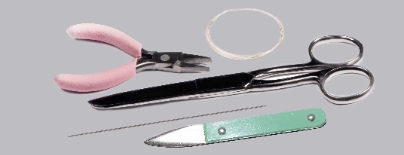
0.20 mm nylon line, thin needle, scissors, flat nose pliers (for flattening the line before threading it into the needle),
flat spike (or you can use the point of the closed scissors or one of the points of the flat nosed pliers)
 

Procedure

Create 5 brown leaves (15101) with a central bronze rib (59145) and 7 honey-coloured leaves (15041) with a central gold rib (59145).

Step 1

Sew the individual poinsettia leaves using the peyote stitch. Start by stringing and tying 5x R10, 1x R10, 1x Th-C, 1x R10, 1x Th-C and 1x R10. Tie them off. Thread the needle and line through 1x R10 and 1x Th-C. Add 3x R10 to the centre of the row. Thread the needle and line through 1x R10, 1x Th-C, 1x R10 and 1x Th-C. Thread the needle and line through the 1x Th-C next to the 1x R10. Now start to make the first side. String 1x Th-C and thread the needle and line into the side Th-C of the three which have been added. Add another 3x R10 and thread the needle and line into the hole of the second side Th-C from those you have added. Start working on the second side. From now on, you should follow the illustration (fig. 1). Thread the line from one side to the other and create the point by adding 3x in the centre of the poinsettia. Otherwise they are added one at a time. Caution: the threading of the outer Th-C on the sides is rather difficult in some cases!

1 / a

Step 2

Notionally divide the broach sieve into 6 segments. Sew the bottom row of a leaf onto the edge of the sieve in each segment. Fasten the leaves to the nylon between the two metal-coated rocailles. Initially tie the nylon to the sieve from the rear. Then thread the line through from the bottom using a hole at the edge, fasten the nylon between the rocailles and then thread the line back through the same hole. Also attach each leaf behind both rocailles next to the gap. Thread the line through the nearest hole of the metal sieve and the rocaille and then thread the line back into the hole. Carry out the same process with the second rocaille. Also pull the remaining end of the line from the leaf into the nearest hole. You can tie it to the line used to sew on the leaves and thus reinforce the sewn connection. Continue to the next leaf.

2 / a

Step 3

Place the leaves in the second upper row on the bottom leaves’ join. Also sew them on in the gaps between the metal-coated rocailles. Thread the line up from the bottom in the area between the bottoms of the lower leaves. Attach the nearest metal-coated rocaille from the rib of the top leaf and thread the line back into the hole. Repeat this procedure 6x. The leaves slightly overlap the edges.

3

Procedure

Step 4

Sew 5x IP6 onto the empty centre of the sieve. Sew each one on separately. Try to lay them in a regular circle. Sew on one bronze R6 (59145) between them from the side of the leaves. Sew 6x gold R10 (18581) to the leaves behind the gold bead. Thread the line through one bronze R and go to the others. Sew the R6 onto the centre of the sieve on the stems made of bronze R10 (59145) and repeat this a total of 3x. Thread the line from the bottom through a hole in the sieve, string 4x R10, add 1x R6 and thread the line back through the 4x R10 and the hole in the sieve.

4

Step 5

Tidy up all of the lines on the bottom of the sieve. Tie them together and cut them off. None of them should extend beyond the edge of the sieve.
Attach the lower section with the broach clasp. Fold over the protruding metal prongs. Place the lower section on the sieve and fold over the prongs until they squeeze against the sieve. Try using the point of the closed scissors or the pliers.
Or glue the lower section onto the lower section without using the prongs.

Cut a piece of ribbon and melt the ends.

Thread the ribbon under the broach clasp and tie it in a bow behind your neck. This creates an excellent necklace for all social occasions.

5 / a

Download

This website is using cookies

To improve our services and provide information that suits your interest, we use the advanced website traffic analytics tools. However, we need your consent. More information about how we process and protect your data can be found in the privacy statement. We ask you for approval of the terms.

Functional cookies These cookies are necessary for the proper functioning of the website and therefore cannot be turned off.
Analytics cookies Analytical cookies help us track and analyze the way visitors interact with our site in Google Analytics 4. This information allows us to improve content and provide a better user experience.
Marketing cookies Reading and writing cookies for marketing purposes for advertising systems such as Google Ads or Sklik. These cookies allow us to track user behavior and measure website performance and the effectiveness of our advertising campaigns.
Personalized advertising Remarketing cookies allow us to present you with personalized advertising based on your previous interactions with our site in systems such as Google Ads, Sklik.
Use of personal data With this option, you consent to the sending and processing of your personal data to Google for the purposes of targeting and evaluating online advertising and targeted marketing.