Floral Bracelet

Difficulty: 2
Technique: Stringing, Basic Beadweaving

Bracelet made of beads and seed beads from the PRECIOSA Traditional Czech Beads™ brand

Floral motifs are still current. Preciosa Ornela presents a tutorial on how to assemble a floral bracelet from the popular PRECIOSA Pip™ and PRECIOSA Pellet™ beads. Be inspired and create your own floral accessory. Choose suitable colors from the wide range of beads and seed beads sold under the PRECIOSA Traditional Czech Beads™ brand. 

Ambassadors

Hana Černá

"I work with beads, therefore I am." The Czech designer Hana Černá, nicknamed Hanule, works with beads and seed beads because she loves being creative. She also teaches others who share her enthusiasm and she does it all with her own type of blacker than black humour. She established the Beads on Facebook (Korálek na Facebooku) group which provides inspiration, encouragement and advice in the area of beadworking.

Learn More

Materials & Tools

Tools

You can also use PRECIOSA Thorn™ beads in the same color as the PRECIOSA Pellet™ for additional decorations.

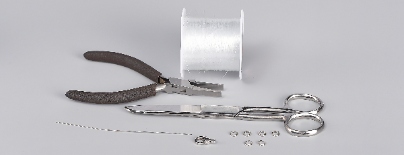
Rings for finishing; a carabiner; Nymo thread or a line; a needle; scissors; pliers
Procedure

Step 1

Thread the needle. String 10x R10, 1x Pl and 10x R10. Thread the needle through the PI. A loop of R10 will be created, on which you will attach the fastening. Do not forget to tighten the thread when working.

1

Step 2

String 3x P and once again thread the needle through the Pl in the same direction from the loop to the rocailles.

2

Step 3

String 3x P again and thread the needle through the Pl so that a flower is created.

3

Step 4

Thread the needle through the following 10x R10, tie the ends and continue with the work. String 1x Pl, 3x P and thread the needle back through the Pl. 

4

Step 5

String 3x P and thread the needle through the Pl. You have created another flower. String 10x R10.

5

Step 6

String 1x Pl and 3x P again and thread the needle back through Pl. Repeat the procedure according to figures 5 and 6 until you have the required length of the bracelet.

6

Step 7

After achieving the required length of the bracelet, string 10x R10 and thread the needle back through the Pl. This will create a loop for the fastening. Sew the thread in firmly and tie several knots. Cut off the thread.

7

Step 8

Finishing

Use the flat nose pliers to attach the fastening – the ring and the carabiner. You can use Th beads to additionally decorate the end of the bracelet with the rings.

8 / a

Downloads

This website is using cookies

To improve our services and provide information that suits your interest, we use the advanced website traffic analytics tools. However, we need your consent. More information about how we process and protect your data can be found in the privacy statement. We ask you for approval of the terms.

Functional cookies These cookies are necessary for the proper functioning of the website and therefore cannot be turned off.
Analytics cookies Analytical cookies help us track and analyze the way visitors interact with our site in Google Analytics 4. This information allows us to improve content and provide a better user experience.
Marketing cookies Reading and writing cookies for marketing purposes for advertising systems such as Google Ads or Sklik. These cookies allow us to track user behavior and measure website performance and the effectiveness of our advertising campaigns.
Personalized advertising Remarketing cookies allow us to present you with personalized advertising based on your previous interactions with our site in systems such as Google Ads, Sklik.
Use of personal data With this option, you consent to the sending and processing of your personal data to Google for the purposes of targeting and evaluating online advertising and targeted marketing.