Small flower

Difficulty: 3
TECHNIQUE: sewing

Small accessory in the shape of a bouquet

Would you like to make your little princess happy? Would you like to create a little gift or a small accessory? Use this tutorial to create small flowers made from PRECIOSA beads and seed beads. Be inspired by our latest pastel colors. You can create countless color variants.

Ambassadors

Helena Chmelíková

She is able to switch from luxurious and extravagant fashion show pieces to the preparation of hobby projects,

Learn More

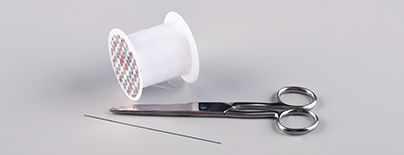
Tools

A 0.20 mm nylon line; a thin needle; scissors; a two-component epoxy adhesive (fast drying)
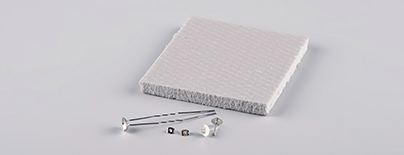
Materials

A hairpin with a small surface (7-8 mm); a post earring with a small surface (7-8 mm); a piece of extruded polystyrene
Procedure

Watch the video tutorial or follow the steps below.
 

Step 1

Cut off about 40 cm of line. String 1x P and 1x R. Thread the line through the P one more time. The R will be held by the loop in the line. String another 5x P and 5x R in the same way (a total of 6x). Try to place the P immediately next to one another. The finished section will twist. It will straighten and adapt during later stringing.

1 / a

Step 2

Thread the line through the holes of all the P one more time. Tighten. Place all the R at the top. Push the hidden R in the central hole between the P or on the opposite side of the R, for example upwards using the point of the scissors.

2 / a

Step 3

Tie off both ends of the line with two knots. Thread the shorter end through the holes in two P. Tighten the line; you may be able to hide the knot in the hole of the P. Cut off. Thread the second end through the hole in 1x P and the R above it.

3 / a

Step 4

Continue stringing the top R. Add 1x R between each of them (the R circle will eventually consists of 12x R). Thread the line through the first R of the circle one more time.

4 / a

Step 5

String 1x FPB. Place it in the R circle. Thread the line through the opposite R, next to the hole of the FPB. Return to the FPB. Thread the line through 2x R on the opposite side before stringing the FPB.

5 / a

Step 6

Tie a double knot. Create a loop from the line between the R. Thread the line through it twice and tighten. Thread the line through a further 2x R. Tighten the line and hide the knot in the holes. Create a simple knot (thread once through the loop). Thread the line through several holes one more time. Hide the knot. Cut off.

6 / a

Step 7

Mix the glue. Apply it to the surface. Hold the flower on the surface until the glue dries. Leave it until the next day to fully harden. You can also create a base for the flower (for example, extruded polystyrene). Place the glued part on it and wait for the glue to dry according to the instructions.

7 / a

Downloads

This website is using cookies

To improve our services and provide information that suits your interest, we use the advanced website traffic analytics tools. However, we need your consent. More information about how we process and protect your data can be found in the privacy statement. We ask you for approval of the terms.

Functional cookies These cookies are necessary for the proper functioning of the website and therefore cannot be turned off.
Analytics cookies Analytical cookies help us track and analyze the way visitors interact with our site in Google Analytics 4. This information allows us to improve content and provide a better user experience.
Marketing cookies Reading and writing cookies for marketing purposes for advertising systems such as Google Ads or Sklik. These cookies allow us to track user behavior and measure website performance and the effectiveness of our advertising campaigns.
Personalized advertising Remarketing cookies allow us to present you with personalized advertising based on your previous interactions with our site in systems such as Google Ads, Sklik.
Use of personal data With this option, you consent to the sending and processing of your personal data to Google for the purposes of targeting and evaluating online advertising and targeted marketing.