Wire jewelry making with PRECIOSA Pip™

Difficulty: 2
technique: Wirework

Wired bracelet

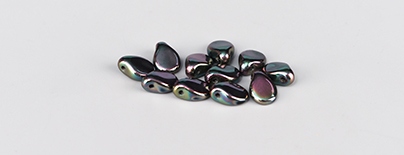
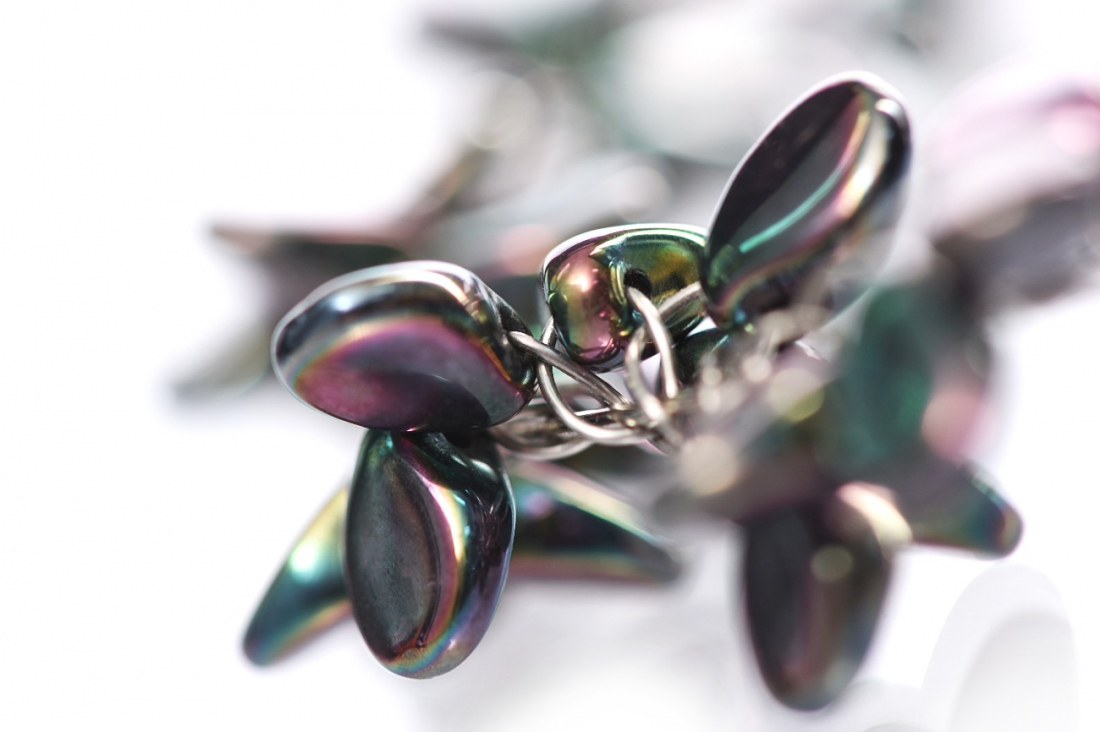
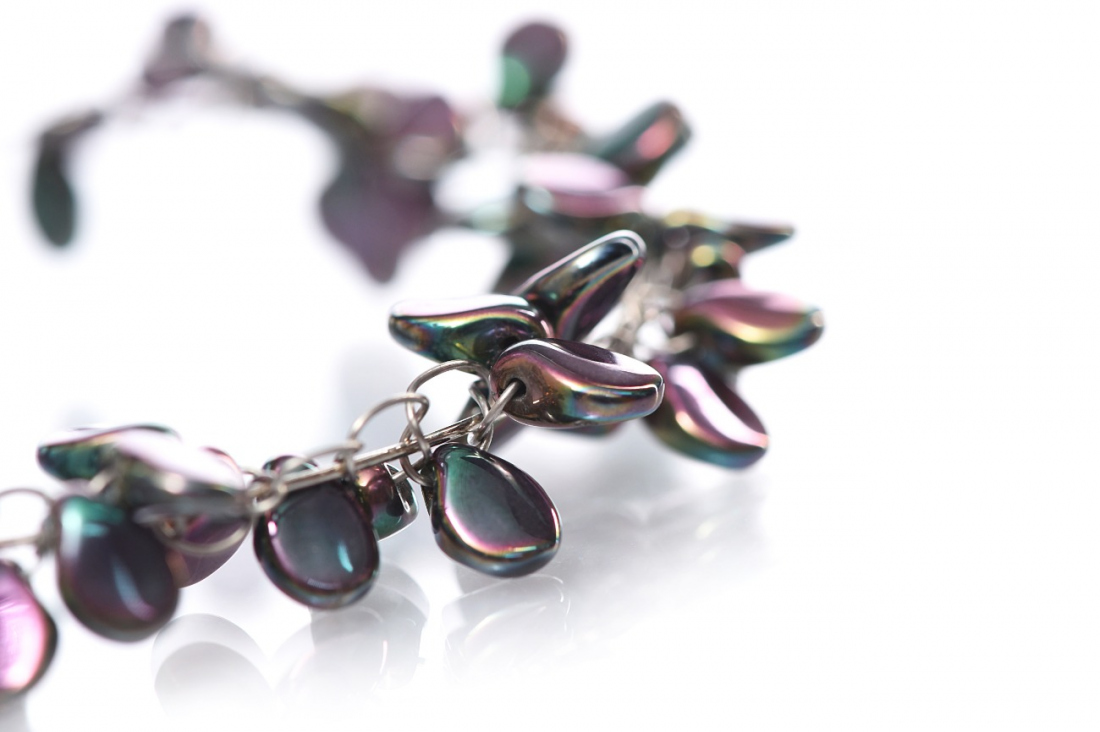
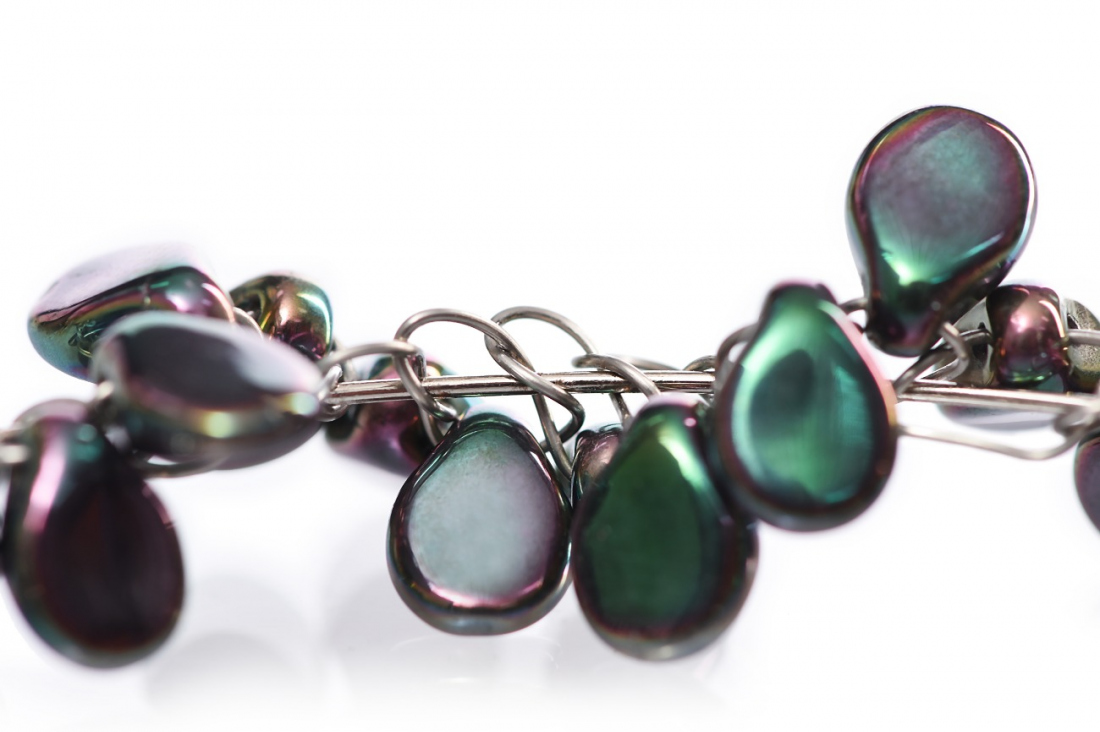
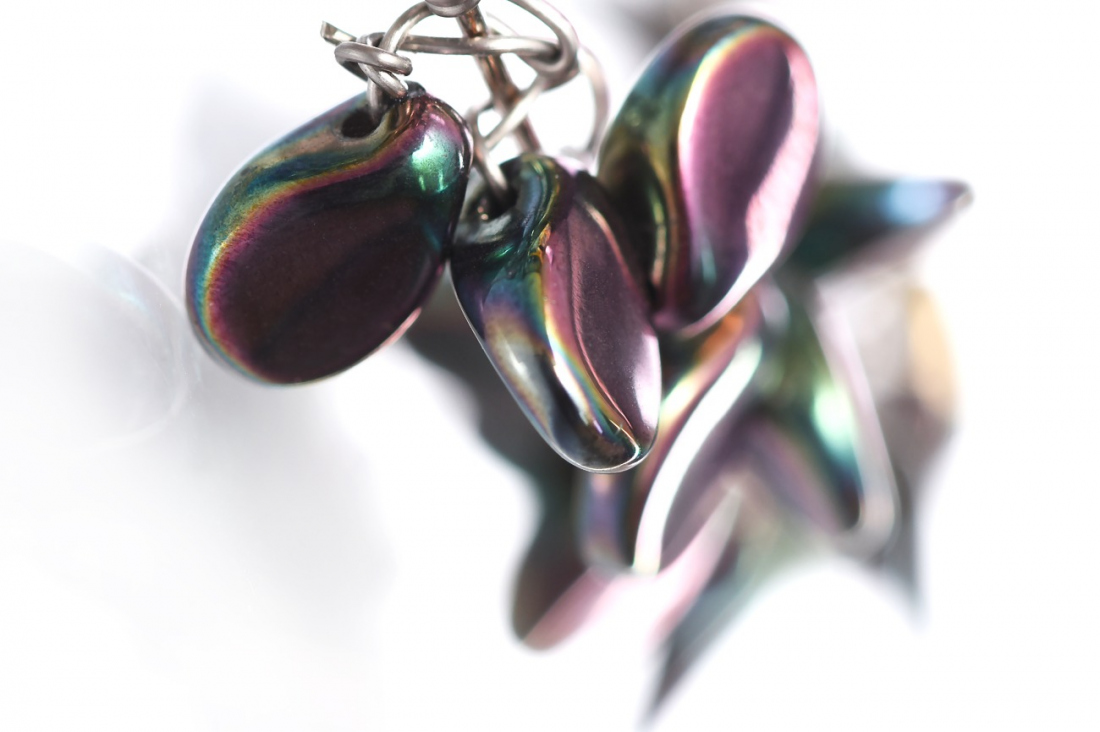
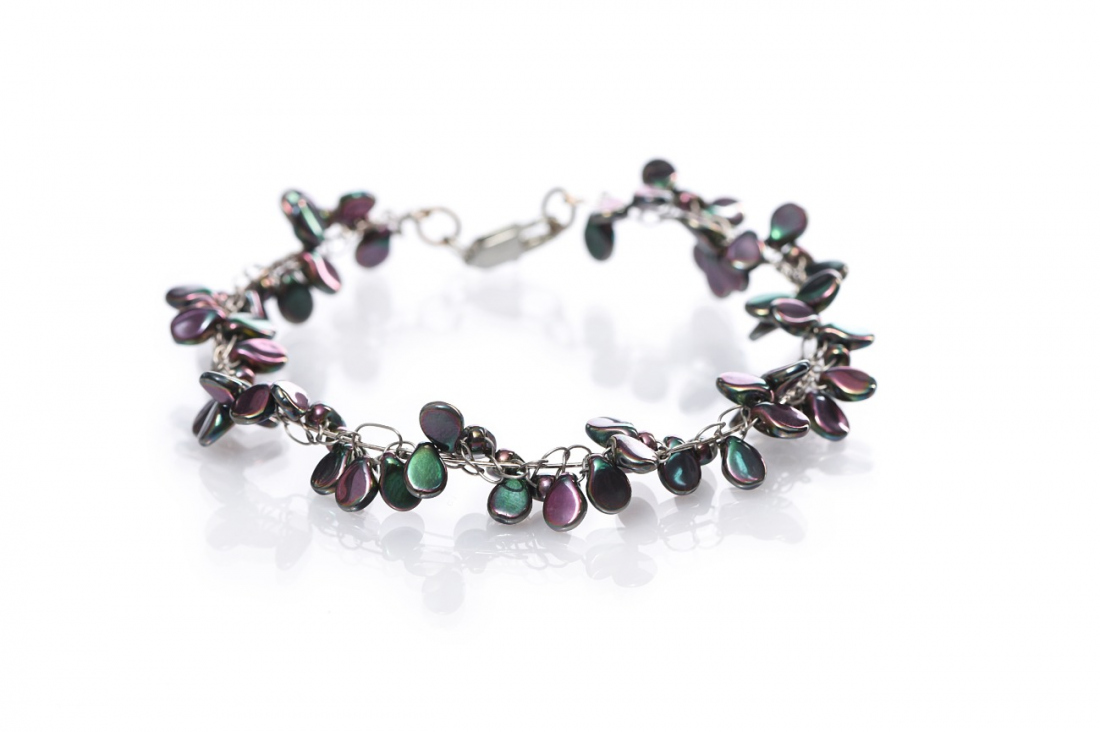
We would like to introduce you to the PRECIOSA Pip™ bead. Its dimensions of 5 x 7 mm comply with the current trend for mini beads. The axially symmetric flattened shape of the small core enables the realisation of half metal coating on both sides of the bead with the resulting effect of an overall decoration. This time, we have tried using these small pressed beads with the wire jewelry making technique. Try it with us and create an original accessory.

Preciosa Ornela wishes you many creative ideas connected with this bead from the PRECIOSA Traditional Czech Beads™ brand.

Materials & Tools

Other materials & tools

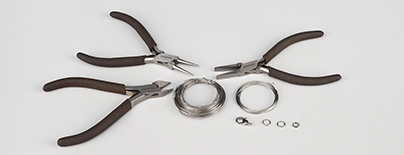
Ca 2.5 m of thin 0.40 mm wire; bracelet memory wire with a diameter of 7 cm; 2x 6mm rings; 1x 4 mm ring; a carabiner; needle nose pliers; flat nose pliers; snipping pliers

Procedure

Step 1

Cut a circle from the 7 cm bracelet memory wire and create a loop at one end (fig. no. 1a and 1b).

1 / a

Step 2

Continue according to the macramé technique and create twisted knots. Fold the wire in half, place the middle of the folded wire onto the lower edge of the memory wire and tie the first simple knot. Then string 1x P on the same side (fig. no. 2a and 2b). Continue in this way until you have covered the entire circumference of the memory wire (fig. no. 2c). Use a total of about 90x P. Then twist both ends of the thin wire around the memory wire twice. Cross both ends twist them twice and snip them off. Use the flat nose pliers to press the snipped ends to the last knot so that they do not scratch you. Create another loop at the second end of the memory wire using the needle nose pliers (fig. no. 2d).

2 / a

Step 3

Pass one ring (6 mm) through each of the loops at the ends of the memory wire and close them using the flat nose pliers (fig. no. 3a). Attach the carabiner to one ring using the 4 mm ring (fig. no. 3b).

3 / a

Downloads