Mossy cushion

Difficulty: 2
Technique: beadweaving

Sewn bracelet made from PRECIOSA Candy™ beads

We would like to acquaint you with the PRECIOSA Candy™ Pressed Bead from the PRECIOSA Traditional Czech Beads™ brand. Preciosa Ornela presents a two-hole low cabochon with a round base with a diameter of 8 mm. Thanks to its shallow curvature, the lower section is highly suitable for use in embroidery and for use in combination with PRECIOSA seed beads and beads.

You can choose from an extensive range of surface finishes on the new PRECIOSA Candy™ two-hole bead. Arrange the low two-hole cabochons and add rocailles in suitable colors to create an elegant bracelet which will become a very pleasant fashion design.

Ambassadors

Helena Chmelíková

She is able to switch from luxurious and extravagant fashion show pieces to the preparation of hobby projects,

Learn More

Material and Tools

PRECIOSA Candy™

111 01 363; 8 mm; 23980/14495 green; 52x
(C1)
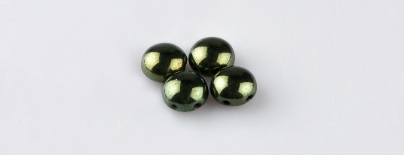
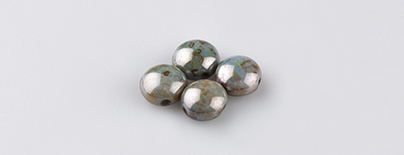
PRECIOSA Candy™

111 01 363; 8 mm; 02010/65431 marble; 24x
(C2)
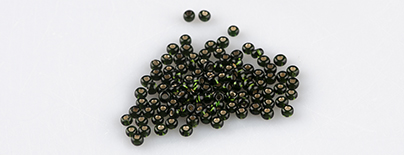
PRECIOSA Rocailles

331 19 001; 10/0; 57290 green; 244x
(R10)
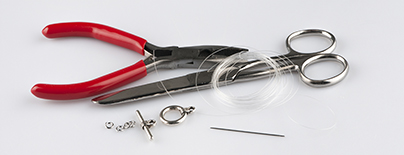
Tools

An American fastening (a T-bar); 5 mm rings; a 0.20 mm nylon line; a thin needle; scissors; flat nose pliers (flattening the beginning of the line, closing the rings)
Procedure

Step 1

Tie the Candy together in groups of 4. Make sure that they are turned in the same direction. The bulging section should be at the top and the straight section at the bottom.

Place 4 C2 next to each other. The bulging section should be at the top. Thread them all through the same holes. Thread the line through the holes in the same direction once again. Tie off the line using three knots. Pull the ends of the lines into the holes. One to the right and the second to the left.

1 / a

Step 2

Sew 3 C1 to the three C2.

2 / a

Step 3

Sew 1 C1, 1 C2 and 1 C1 to the four C2.

3

Step 4

Sew 3 C2 to the outer C2.

4

Step 5

Sew 3 C1 to the two side C2.

5

Step 6

Repeat steps 3 - 5.

Step 7

Repeat steps 3 - 5.

Step 8

Repeat steps 3 - 5.

Step 9

Repeat steps 3 - 5.

Step 10

Sew 3 C1 to the outer C2.

10

Step 11

Prepare the fastening. Affix 3 rings to the loop at the "T". Affix 1 ring to the fastening's circle.

11

Step 12

Reinforce the bracelet around its circumference. Thread the line through the second holes of the outer C1.


12

Step 13

Sew 2 groups of 10 R10 into the triangular notches on the longer sides. Start at the upper C1. String 10x R10. String the opposite central C1. Thread the line in the notch and the lower C1. Thread the line through the open hole of the next central C1. String 10x R10. Thread the line through the adjacent upper C1.


13

Step 14

Add 4 R10 on the side with the fastening. Sew on the fastening at the top C1. Thread the line through the outer hole of the C1, string 3x R10, the fastening and 3x R10. Thread the line through the stringing with the fastening once again in the same direction.

Tie off the line using three knots. Pull the ends into the surrounding C1. Cut it off.


14 / a

Downloads