Happy Easter!

Difficulty: 2
Technique: Basic Beadweaving
Designer: Martina Jůnová

Seed bead Easter egg

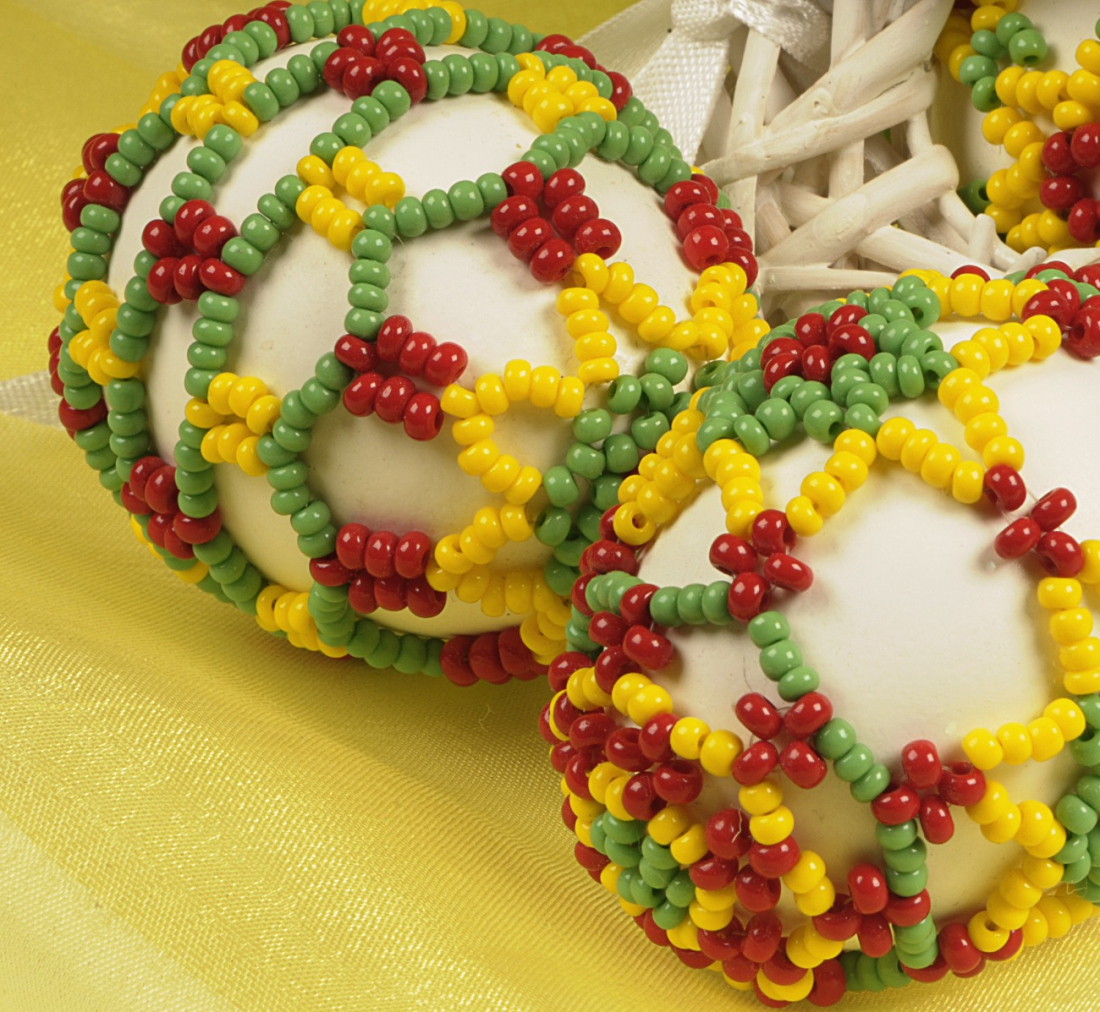
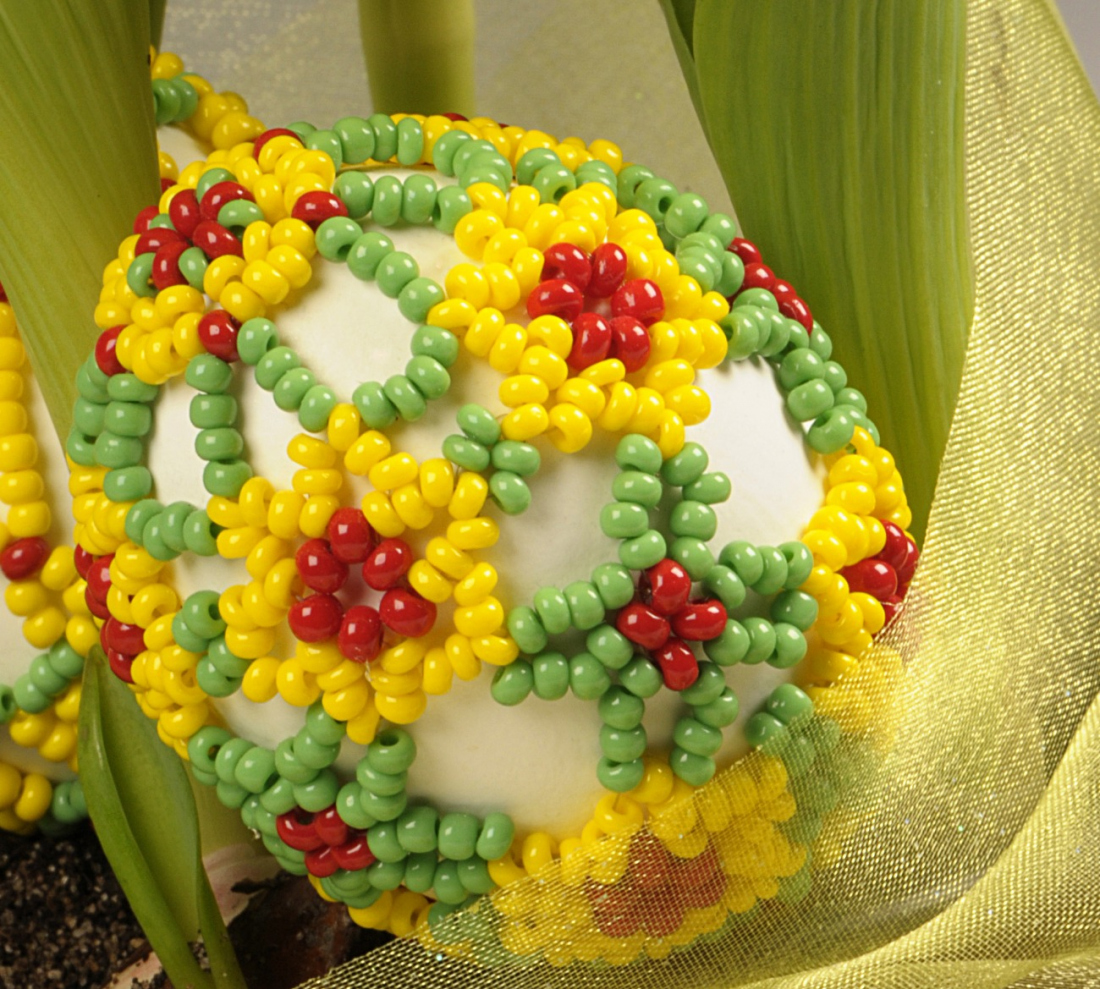
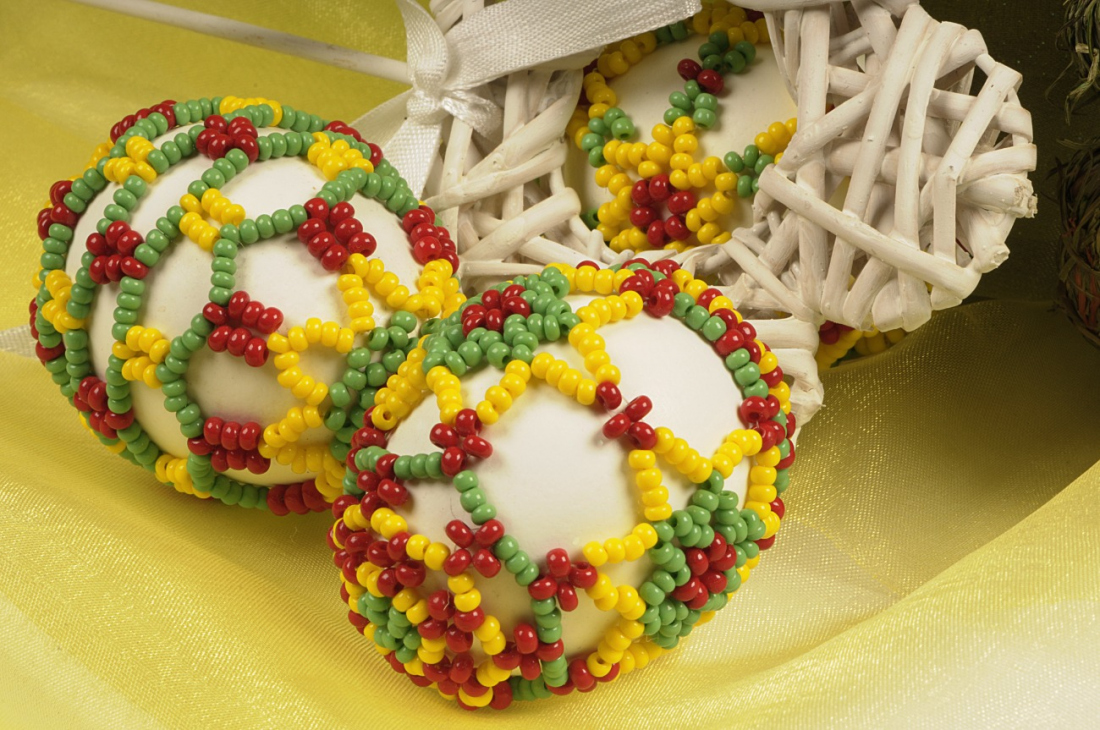
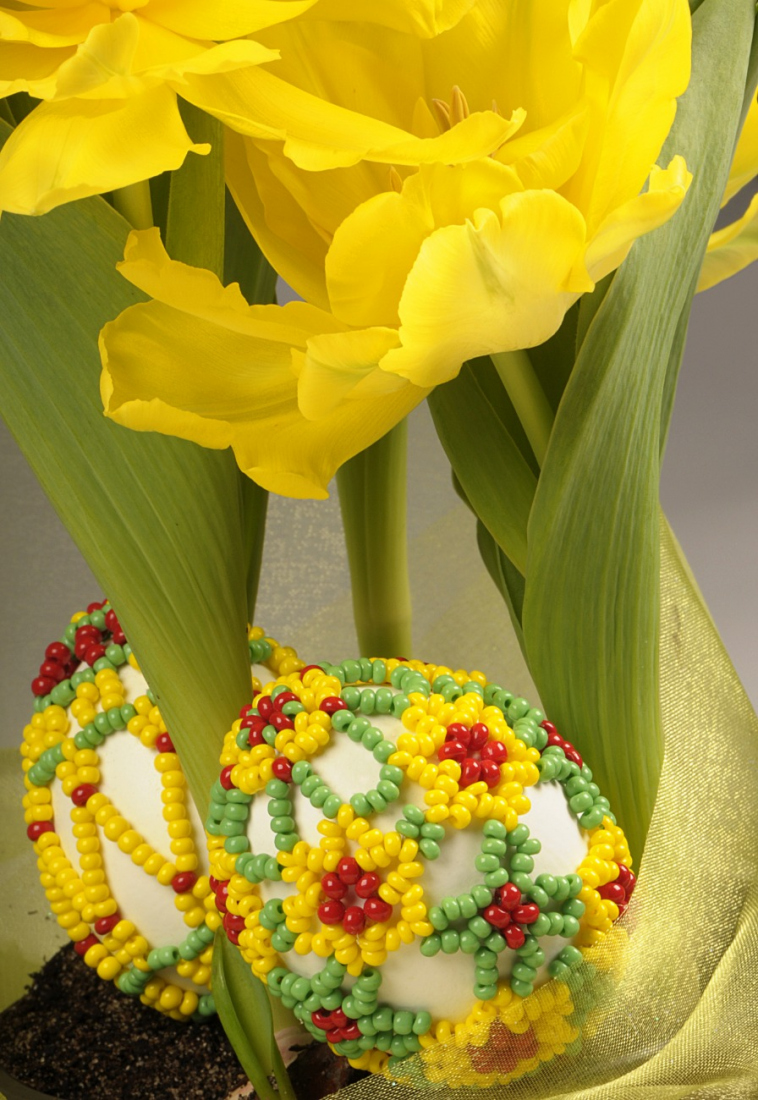
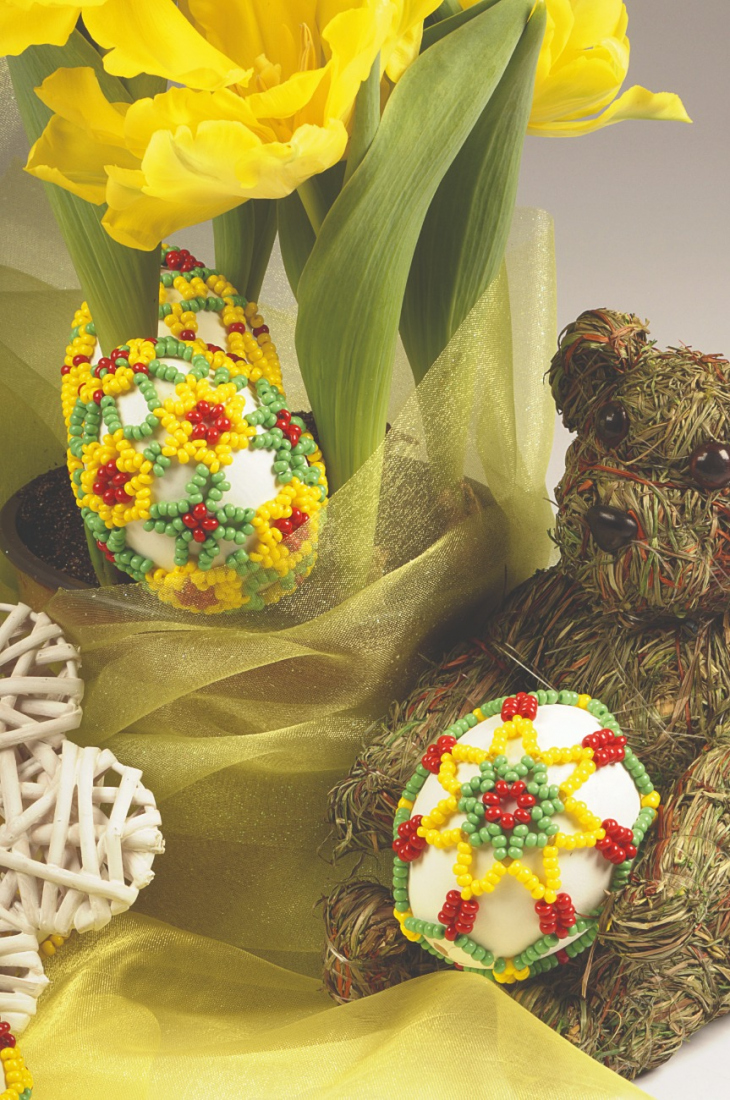
Naturally, Preciosa Ornela cannot celebrate the coming of spring in any other way than with decorations made from seed beads from the PRECIOSA Traditional Czech BeadsTM brand. This year, try decorating your Easter eggs with netting made from seed beads. Each one can be a handmade original. 
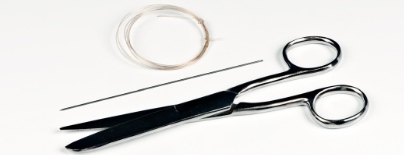
Procedure

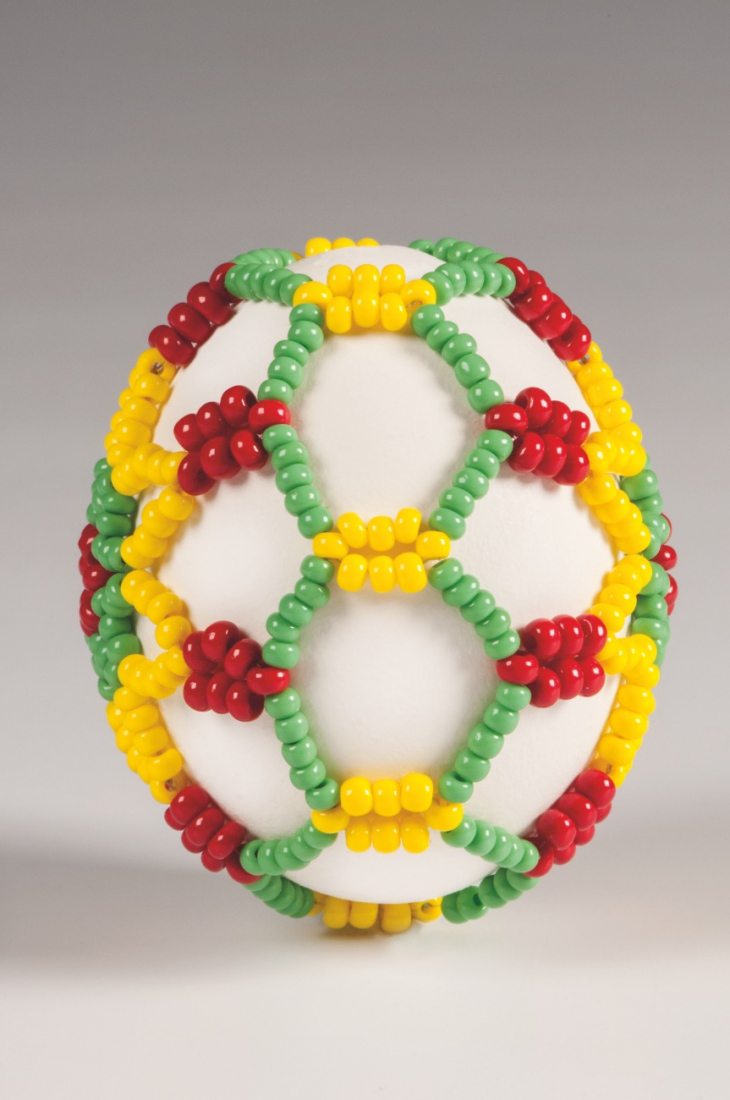
Create two identical seed bead flowers which are connected together along the circumference of the egg so that it is enclosed in the seed bead netting.

Step 1

String 7x red R7 onto the line and tie three strong knots on the line. This creates the basic ring. Thread the end of the line through the first R7 of this row one more time (figure no. 1).

1

Step 2

String 6x green R7 and thread the line through each odd-numbered red R7 in the basic ring according to the illustration. Then do the same again and add 4x R7. String a total of 35x green R7 (fig. no. 2). Thread the end of the line through the first R7 from this row one more time.

2

Step 3

String 9x yellow R7 according to the illustration and thread the line through the green R7 from the previous row one more time. String a total of 63x yellow R7 (fig. no. 3). Thread the end of the line through the first R7 of this row one more time.

3

Step 4

String 7x red R7 according to the illustration and thread the line through one yellow R7 from the previous row one more time. String a total of 49x red R7 (fig. no. 4). Thread the end of the line through the first R7 from the first row one more time.

4

Step 5

String 5x green R7, 1x yellow R7 and 5x green R7 according to the illustration and thread the end of the line through the red R7 according to the illustration. Repeat this procedure 6x (fig. no. 5). String a total of 70x green R7 and 7x yellow R7 in this row. Tighten the entire stringing appropriately and finish off with two knots. Thread the end of the line through the nearest seed beads and cut it off.

5

Step 6

Repeat the entire procedure from 1 – 5 one more time. String 5x green R7 and 4x yellow R7 according to the illustration, thread the end of the line through the yellow R7 from the edge of the first part of the netting,  4x yellow R7, thread the end of the line through the first yellow R7 from the second netting according to the illustration, tighten it appropriately, string 5x green R7 and thread the end of the line through the red R7 from the first netting according to the illustration. Gradually connect both flowers in this manner (fig. no. 6). Place the egg in the connected netting and gradually close up the entire netting. It is possible to reduce or increase the number of yellow seed beads which connect both parts of the Easter netting according to the size of the egg.

6 / a

Downloads